Nail pops in drywall are small bumps or raised circles that form on your walls and ceilings when nails or screws loosen and push outward through the surface. They are one of the most common issues homeowners face before a paint job, and painting over them without fixing them first means the bumps will show right through the fresh coat. The good news is that fixing nail pops correctly takes only a few simple tools and about an hour of work, and the result is a smooth, paint-ready surface that looks flawless. This guide walks you through every step, from finding nail pops to sealing them so they never come back, plus answers to the most common questions homeowners in Lexington, SC ask before tackling this repair.
How to Fix Nail Pops in Drywall Before Painting
Fixing nail pops in drywall before painting requires five steps: locate the pop, drive the nail back in or add a new screw nearby, scrape away loose material, fill the dimple with spackle or joint compound, sand it smooth, prime it, and then paint. Skipping any of these steps, especially the fastener step, means the pop will simply come back within weeks or months.
According to data from Angi, professional drywall repair for nail pops and similar issues costs between $294 and $893, depending on the number of pops and the extent of surface damage. Doing the repair yourself costs far less, typically between $10 and $55 in materials, according to industry data from Faircloth Drywall. For homeowners in Lexington, Red Bank, and Gilbert who want to save money before a fresh paint job, learning the proper DIY technique pays off quickly.
The most important thing to know before you start is that simply hammering a nail back in and painting over it is not a real fix. The fastener will move again, and the pop will return. A permanent repair means securing the drywall with new fasteners and then filling the dimple properly so it bonds to the surrounding surface for the long term.
Before any paint goes on the wall, surface prep is everything. Nail pops repaired the right way blend invisibly into the wall. Nail pops that were skipped or painted over look like small craters or raised bumps under raking light, which is exactly the kind of imperfection that stands out in freshly painted rooms.
Walls that have more significant damage beyond simple nail pops, such as large cracks, holes, or water-stained sections, often need more than a spot repair. Sheetrock installation and repair handles those more involved wall corrections before any paint is applied, giving you a fully smooth and solid surface to work from.
Why Do Drywall Nail Pops Happen?
Drywall nail pops happen because the wood framing behind the drywall expands, contracts, and shifts as it responds to temperature and humidity changes throughout the year. When the framing moves, the nails or screws holding the drywall in place move with it, loosening their grip and pushing outward through the drywall surface.
This is the most common cause of nail pops, and it happens in both new and older homes. According to Bob Vila, lumber used in home construction absorbs moisture from the air during storage and construction. After the home is complete, the wood slowly dries and can twist or shift slightly as it does. That movement is what dislodges the fasteners and pushes them outward.
South Carolina’s humid climate makes this process more pronounced than in drier regions. Lexington homes experience warm, moist summers and drier winters, and that seasonal swing causes wood framing to swell and shrink repeatedly over the years. Every expansion and contraction cycle puts a little more stress on fasteners, gradually working them loose. According to professional drywall contractors at Drywalltalk.com, most screw pops appear when the heat is first turned on in fall and winter, because the heating season draws moisture out of the framing quickly and causes rapid shrinkage.
Other causes of nail pops include fasteners that were not the right length, fasteners installed too close together or too far apart, and homes that are still settling after recent construction. According to Bob Vila, a drywall screw should penetrate the stud by a minimum of three-quarters of an inch to hold properly. A screw that barely reaches the stud has very little grip and is much more likely to pop out over time.
Are Nail Pops a Common Problem in Homes?
Yes, nail pops are a very common problem in homes, both new and old. According to Angi, nail pops occur in homes across all ages due to the natural settling and shifting of the structure over time. They are especially common in newer construction, where the framing lumber has not yet had time to fully dry and stabilize. Drywall contractors on professional forums note that some screw pops on every new build are simply expected, and most builders include a one-year warranty call-back specifically to address them after the home has settled through its first heating and cooling season.
In older homes, nail pops tend to cluster in the same spots over and over because the framing in those areas is prone to movement. If you see nail pops returning in the same location after you repaired them, the framing behind that section of drywall is still active. Adding extra screws to anchor the drywall more firmly to the stud is the right solution in those spots, not just re-filling the dimple.
Do Nail Pops Affect My Home’s Value?
Yes, nail pops affect your home’s value if they are visible and left unrepaired. Buyers and home inspectors notice visible wall defects, and a wall covered in bumps, raised circles, and cracked paint signals that the home has not been well maintained. According to data from Opendoor, 63% of real estate agents recommend painting the interior of a home before selling, and that recommendation always assumes the walls are properly prepped first. A fresh coat of paint applied over unrepaired nail pops makes the problems more visible, not less.
Interior paint delivers an average return on investment of 107%, according to data from Angi, but only when the underlying surface is properly prepared. That ROI drops significantly when buyers walk through and see obvious wall defects under new paint. Fixing nail pops before painting is one of the simplest, lowest-cost steps a homeowner can take to protect the full value of a paint job investment.
Homes in the Lexington, SC real estate market benefit from being move-in ready. Clean, smooth walls that have been properly repaired and freshly painted make a strong first impression on buyers and real estate agents alike. Homeowners preparing to list often schedule a complete interior repaint alongside wall repairs so every room is finished at the same time. Full house painting that covers walls, ceilings, trim, and all repaired surfaces keeps the project on a single timeline and delivers a consistent result throughout the home.
What Tools Do I Need to Fix Nail Pops?
The tools you need to fix nail pops are a hammer, a nail set or nail punch, a Phillips-head screwdriver or drill with a drywall bit, a putty knife in the 4 to 6-inch range, lightweight spackle or all-purpose joint compound, 100 to 120-grit sandpaper or a sanding sponge, a drywall primer, and a small brush or roller for touch-up paint.
Every one of these tools is available at any hardware or home improvement store, and most homeowners already have several of them on hand. The putty knife is the most important tool for applying and feathering the compound smoothly. A flexible putty knife, rather than a rigid one, gives you more control when spreading the compound thin across the repair area, which is what makes the patch blend invisibly into the surrounding wall.
A sanding sponge is preferable to flat sandpaper for nail pop repairs because the sponge conforms to the slight curvature of the wall surface and is less likely to cut through the paper drywall facing on either side of the repair. Flat sandpaper pressed too hard against a small repair area can scuff the surrounding surface and create a new problem to fix. Use light, circular strokes with the sanding sponge until the repair is flush with the wall and you cannot feel any ridge or bump when you run your hand across it.
How Do Builders Fix Nail Pops?
Builders fix nail pops by first securing the drywall with new fasteners placed one to two inches above and below the original nail or screw, then driving the old fastener back below the surface or removing it entirely, and finally filling both the old dimple and the new screw dimples with joint compound or lightweight spackle before sanding and painting.
The fastener step is the step most homeowners skip, and it is the most important one. According to the Family Handyman, simply driving a popped nail back in is a short-term fix. Without new fasteners to hold the drywall panel firmly against the stud, the original nail has nothing to stop it from popping again. Professional builders and painters always install new screws as the first step because they know that a well-anchored drywall panel does not have the freedom of movement that causes pops in the first place.
According to Bob Vila, when hanging drywall, a fastener should be inserted every eight inches along the panel edges and every twelve to sixteen inches across the center of the panel over each stud. Areas where nail pops occur frequently often had fasteners installed too far apart, leaving sections of drywall with too much flex between anchor points. Adding a new screw one to two inches from the original pop location addresses that gap directly.
For homes throughout Lexington and Red Bank, where seasonal humidity swings are significant, builders and painters use coarse-thread drywall screws rather than nails whenever possible. Screws grip the framing more aggressively than nails and resist backing out under the kind of wood movement that South Carolina’s climate produces year after year. Exterior surfaces face the same moisture stress from the outside. Exterior painting services that include proper caulking and priming of all wood trim and siding help seal those surfaces against moisture intrusion that can work its way inward and contribute to wall movement over time.
Can I Just Hammer In Nail Pops?
No, you should not just hammer in nail pops as a permanent fix. Hammering a popped nail back below the surface addresses the appearance of the problem but not the cause. The nail will work its way back out again because the drywall is still not firmly anchored to the framing in that spot. According to professional drywall contractors, this short-term approach means you will be doing the same repair in the same spot again within one or two seasons.
The correct approach is to hammer the nail back below the surface to dimple it, and then install a new 1.25-inch drywall screw one to two inches above and one to two inches below the original nail. Those two new screws clamp the drywall firmly to the stud. Once the drywall is anchored, the original nail has no path to push outward again, and the repair holds indefinitely.
If the nail is a flat-head nail that cannot be driven back below the surface cleanly, remove it entirely with a pry bar or the claw of a hammer. Then install two new screws as described above. The resulting dimples from the screws and the original nail hole get filled with compound in the next step.
What Is the Best Spackle for Nail Pops?
The best spackle for nail pops is a lightweight all-purpose spackle for small, individual pops on smooth walls, or an all-purpose joint compound for ceiling repairs, textured walls, or areas with multiple pops close together. Both products work well when applied correctly, but they have different strengths depending on the situation.
Lightweight spackle is the faster choice. According to Bob Vila, spackle dries in about 30 minutes, meaning you can sand and paint a nail pop repair the same day. It shrinks very little as it dries, so small repairs usually need only one coat. It sands smoothly and accepts primer and paint without issues. For most homeowners doing a few spot repairs before painting a room in Lexington, lightweight spackle in a small tub is the right tool for the job.
Joint compound, also called drywall mud, takes up to 24 hours to dry per coat and shrinks more than spackle as it dries, which means you will likely need two or three thin coats to build the repair back up to flush. According to professional drywall contractors at Colin Can Help, joint compound is the better choice for ceiling nail pops, textured walls, or areas where multiple fasteners have popped in the same section and you need to blend the patch across a wider area. Joint compound feathers out over a larger zone and blends more seamlessly with existing wall texture.
Quick-setting joint compound is a middle-ground option. According to Bob Vila, quick-set joint compound can dry in as little as 45 minutes, which makes it much faster than standard all-purpose mud without sacrificing the smoothness and blending ability that makes joint compound better for larger repairs.
Can I Use Spackle to Fill Nail Holes in Drywall?
Yes, spackle is one of the best products for filling nail holes in drywall. Lightweight spackle is specifically designed for small surface imperfections like nail holes, dings, and minor dents. It dries quickly, shrinks very little, sands smoothly, and bonds well to drywall. According to HGTV, you can often fill minor nail holes with a single coat of spackle and be ready to sand and paint within 30 minutes.
The key to a good nail hole repair with spackle is applying a thin coat, not a thick blob. Press the spackle into the hole with your putty knife, then draw the blade flat across the surface to remove the excess. What remains in the hole is just enough compound to fill the void. Once it dries, sand it lightly with a fine-grit sponge. For very small nail holes from picture hangers, you can often use your fingertip to push a pea-sized amount of spackle into the hole and smooth it flat. No tools required.
For nail pop repairs that involve a visible bump rather than just a hole, the process is slightly different. You need to drive the fastener back below the surface first, creating a dimple. Then fill that dimple with spackle or joint compound. The dimple gives the compound somewhere to sit flush with the wall rather than sitting on top of the surface like a bump.
What Do Professional Painters Use to Fill Nail Holes?
Professional painters use lightweight spackle for small individual nail holes, all-purpose joint compound for larger repairs and ceiling work, and quick-setting joint compound when they need faster dry times on jobs with many patches. According to professional painting contractors, the product choice depends on the size of the repair, the surface texture, and how quickly they need to move to the priming and painting steps.
Many professional painters also prime the patched areas with a shellac-based or PVA drywall primer before applying the finish paint coat. Unprimed spackle and joint compound are both porous and absorb paint differently than the surrounding sealed wall surface. That difference in absorption creates a dull spot, called a “flash,” that shows through the paint, especially in satin or semi-gloss finishes. Spot-priming every patch before painting eliminates flashing and ensures that the finished wall looks uniform from every angle.
When a room has many nail pops repaired at once, professional painters often prime the entire wall rather than just the patches. This gives the finish coat a fully consistent base to bond to, and it eliminates any risk of individual patches showing through the paint as dull or differently shaded spots.
Homeowners who want walls that look like a professional painter handled every step, from prep through the final coat, often get the best results by calling in a painting crew that handles surface repair as part of the job. Interior painting services that include full wall prep, patching, priming, and finish painting deliver a consistent result across every surface in the room.
How to Fix Nail Holes in Drywall Before Painting: Step by Step
Fixing nail holes in drywall before painting follows a clear sequence that any homeowner can complete over the course of a weekend afternoon. Here is the full professional process from start to finish.
Step 1: Find All the Pops First
Walk the room with a bright work light or flashlight held at a low angle against the wall. Raking light reveals bumps, shadows, and raised spots that are invisible under normal overhead lighting. Circle every nail pop you find with a pencil so you can address them all in one pass. Running your hand along the wall in a slow sweep also catches pops that are still small and barely visible.
Step 2: Drive or Remove the Original Fastener
If it is a nail, use a nail set and hammer to drive it about an eighth of an inch below the drywall surface without breaking through the paper facing. If it is a screw, use a drill or screwdriver to drive it back below the surface the same way. For nails that resist being driven back in cleanly, remove them entirely with a pry bar or hammer claw.
Step 3: Add New Screws to Anchor the Drywall
Drive a 1.25-inch coarse-thread drywall screw into the stud one to two inches above the pop and another one to two inches below it. Drive each screw until it creates a shallow dimple in the drywall surface without breaking through the paper. These two screws are what prevent the pop from coming back. Do not skip this step.
Step 4: Scrape Away Loose Material
Use your putty knife to scrape off any raised or crumbling old joint compound, loose paint chips, or crushed drywall paper from around the original pop. The repair area needs to be clean and firm before you apply new compound. Loose material left under a patch will cause the patch to crack or separate.
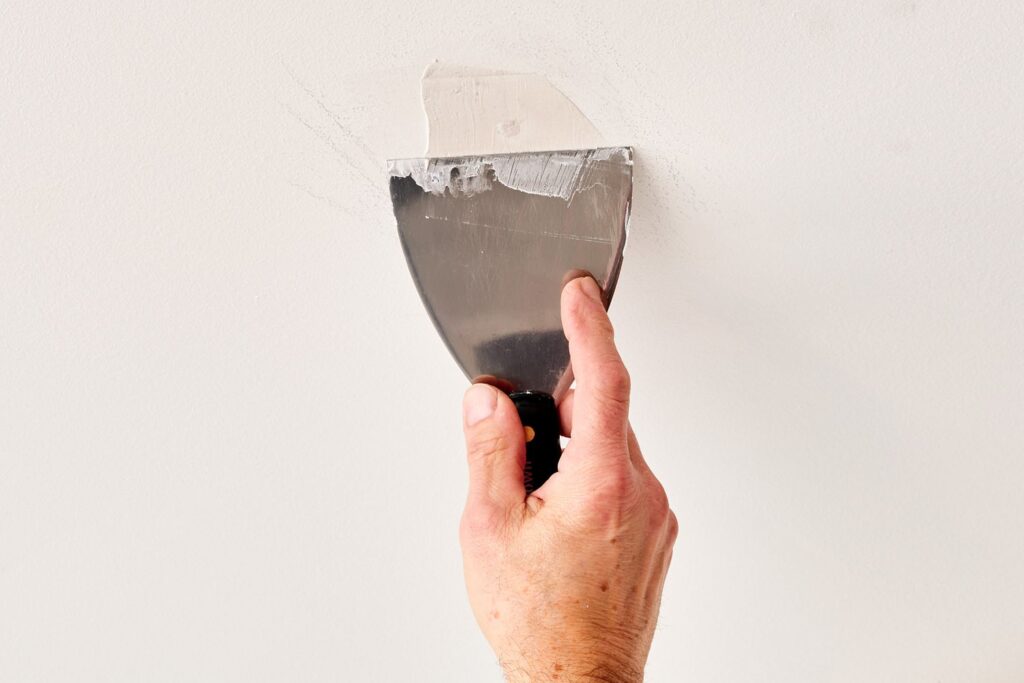
Step 5: Apply the First Coat of Compound
Press a thin layer of lightweight spackle or all-purpose joint compound over the dimple with your putty knife. Draw the blade flat across the surface to remove the excess. You are not trying to build the repair up in one coat. A thin, flush coat that fills the dimple is the goal. Apply this same thin coat over the two new screw dimples as well.
Step 6: Let It Dry and Apply a Second Coat if Needed
Lightweight spackle dries in about 30 minutes. Joint compound takes up to 24 hours per coat. Once the first coat is fully dry, run your fingertip across the patch. If you feel any depression or if the compound has shrunk below the wall surface, apply a second thin coat. Two coats are often enough for nail pop repairs.
Step 7: Sand Smooth
Use a fine-grit sanding sponge or 100 to 120-grit sandpaper to sand the dried patch until it is completely flush with the surrounding wall. Wipe away all sanding dust with a slightly damp cloth. The surface should feel perfectly smooth when you run your hand across it with your eyes closed.
Step 8: Prime and Paint
Apply a coat of drywall primer or shellac-based spot primer to every patched area. This seals the porous compound and ensures the finish paint adheres and dries evenly. Once the primer is dry, apply your finish paint with a small roller for texture consistency, feathering the painted area into the surrounding wall to blend the patch completely.
Will Painting Over Nail Pops Hide Them?
No, painting over nail pops will not hide them. Paint follows the surface it is applied to. If the surface has a raised bump, the paint covers that bump and preserves its shape exactly. In most lighting conditions, a painted-over nail pop is just as visible as an unpainted one. Under raking light, it is even more obvious because the painted finish creates a slight sheen that highlights every surface irregularity.
This is one of the most common painting mistakes homeowners make when trying to save time before a project. The thought is that a fresh coat of paint will smooth everything out. Paint does not do that. Paint is a thin coating, not a filler. It takes on the exact shape of whatever surface it is applied to. Only a patching compound fills and levels the surface so that paint can cover it invisibly.
In homes throughout Lexington and the Lake Murray area, properly prepped walls make a huge difference in the final look of a paint job. A freshly painted room where every nail pop was filled and sanded first looks completely different from one where the pops were left in place. The prep work is invisible in the finished result, but its absence is always obvious.
Is It Worth Fixing Nail Pops?
Yes, fixing nail pops is always worth it. The repair cost in materials is minimal, typically under $20 for a small tub of spackle, a putty knife, and some sandpaper. The time investment for a handful of nail pops is one to two hours including drying time. The result is a wall that looks smooth, clean, and professionally finished after painting.
Skipping the repair means the paint job you invest in will show every pop through the finish. That outcome wastes the effort and cost of painting. According to data from Angi, interior painting delivers an average return on investment of 107%, but that return depends entirely on the quality of the preparation beneath the paint. Fixing nail pops is a core part of that preparation.
For homeowners in Red Bank and Gilbert who are getting ready to sell, fixing nail pops before listing is a no-cost-to-value improvement. According to Opendoor data, 80% of real estate agents believe that painting a home has a positive impact on its value, and a paint job that covers smooth, properly prepped walls is far more impressive to buyers than one applied over obvious wall defects. Commercial properties benefit from the same principle. Offices and retail spaces with smooth, well-finished walls project professionalism to clients and tenants from the moment they walk in. Commercial painting that includes proper wall prep before any color is applied delivers that polished appearance that sets a business apart.
How Does a Painter Fix Nail Pops?
A painter fixes nail pops by following the same secure-fill-sand-prime process described above, often as part of the room preparation before any wall color is applied. Professional painters treat every visible nail pop, dent, and crack on the wall before their rollers or brushes touch the painted surface. This prep phase is non-negotiable in professional work because the final coat of paint reveals every flaw in the surface below it.
The difference between a professional painter’s nail pop repair and a quick DIY patch often comes down to feathering. Professionals apply joint compound in thin, wide swipes that blend the repair zone gradually into the surrounding wall over a six to eight-inch area. This feathering makes the patch invisible once painted because there is no abrupt edge where the compound ends and the original wall surface begins. A beginner tends to apply compound in a small, thick mound that, even after sanding, leaves a slightly raised circle visible under paint.
Professional painters also spot-prime every patch before applying finish paint. This step is commonly skipped by DIYers, and it is the main reason patched areas sometimes look dull or flat under new paint while the surrounding wall looks shiny and even. Priming the patches seals the porous compound so it absorbs paint the same way the rest of the wall does.
When a room has extensive wall damage, including many nail pops, cracks at corners, and areas where the drywall was improperly finished during original construction, the right solution is often a full skim coat rather than individual spot repairs. Drywall repair and painting services handle everything from isolated nail pop patching to full-room skim coats that create a perfectly smooth wall surface ready for any paint finish.
What Is a Common Mistake People Make When Applying Mud to Drywall?
The most common mistake people make when applying mud to drywall is applying it too thick in a single coat. A thick application of joint compound shrinks significantly as it dries, which creates a depression in the center of the repair, cracking along the edges, and a surface that needs to be filled again before it is flush with the wall. According to professional drywall finishers at MT Copeland, multiple thin coats always produce better results than one heavy coat.
The second most common mistake is not feathering the edges. If the compound is applied in a small, defined patch with sharp edges, those edges will show under paint as a visible ridge. The fix is to drag the putty knife outward from the center of the repair in long, light strokes, gradually thinning the compound until it blends seamlessly into the surrounding wall. This feathering process takes a little practice but makes the difference between a repair that looks like a repair and one that is completely invisible.
A third common mistake is skipping the primer after patching. Joint compound and spackle are both porous materials that absorb paint at a different rate than sealed drywall. Painting directly over a patch without priming it first causes that spot to look dull or flat under the finish coat. A single application of shellac-based spot primer or PVA drywall primer on every patched area solves this before it becomes a problem.
| Repair Product | Best Use | Dry Time | Coats Needed | Shrinkage |
|---|---|---|---|---|
| Lightweight Spackle | Small nail pops, nail holes, dings on smooth walls | ~30 minutes | 1-2 | Minimal |
| All-Purpose Joint Compound | Ceiling pops, textured walls, multiple pops in same area | Up to 24 hours | 2-3 | Moderate |
| Quick-Setting Joint Compound | Faster repairs on larger areas | ~45 minutes | 2-3 | Low-Moderate |
| Vinyl Spackle | Medium-sized holes, deeper repairs up to ¾ inch | 1-2 hours | 1-2 | Very low |
Dry time and usage data sourced from Bob Vila, HGTV, and Angi drywall repair guides. Actual dry times vary by humidity, temperature, and coat thickness.
Can I Use Caulk to Fill Nail Holes in Drywall?
No, caulk is not the right product for filling nail holes in drywall. Caulk is flexible, which means it never dries hard enough to sand smooth. If you apply caulk to a nail hole and then try to sand it, the caulk drags and smears rather than sanding down flush. The result is a soft, uneven area that shows clearly under paint.
Caulk is the right product for filling gaps between surfaces that move in relation to each other, such as the joint between the baseboard and the wall, the seam around a window frame, or the gap where two different materials meet. Those joints need a flexible filler that can stretch slightly without cracking. A nail hole in the middle of a flat wall surface needs a rigid filler that can be sanded perfectly smooth, which is what spackle and joint compound are designed to do.
There is one exception. Paintable latex caulk is sometimes used to fill the very thin gap between the top edge of a baseboard and the wall before painting trim. That specific application works because the gap is not being sanded, it is being painted directly. For any wall hole or nail pop that needs to be sanded and painted over, always use spackle or joint compound, not caulk. Outdoor structures like sheds and porches face similar surface prep needs before any paint goes on. Shed painting that starts with proper surface filling, caulking, and priming lasts far longer than a coat of paint applied directly over unaddressed gaps and cracks.
Keeping your home’s walls, trim, and painted surfaces in top condition takes ongoing attention. When the scope of repairs grows beyond a few nail pops to include full rooms needing fresh color, residential painting services covering everything from surface prep to final coat keep the project on schedule and the results professional throughout.
Frequently Asked Questions
How do you fix nail pops in drywall in Lexington, SC homes before painting?
Fixing nail pops in Lexington, SC homes before painting follows the same process as any interior drywall repair: secure the drywall with new screws, drive the original fastener below the surface, fill the dimple with lightweight spackle or joint compound, let it dry fully, sand it smooth, and prime before painting. Lexington’s humid summers and drier winters cause wood framing to expand and contract significantly, which means nail pops here tend to recur if the drywall is not properly re-anchored with new screws during the repair. Adding one screw above and one below every original pop location is especially important in South Carolina’s climate.
How do you hide nail pops in drywall?
You hide nail pops in drywall by properly repairing them, not by painting over them. Drive the fastener back below the surface, add new anchoring screws nearby, fill the dimple with spackle or joint compound applied in thin coats, sand smooth, prime the patch, and then apply your finish paint with a small roller to match the surrounding texture. A repaired and primed nail pop is completely invisible under paint. A painted-over pop without repair remains visible under almost any lighting condition.
What is the best way to prevent nail pops from coming back?
The best way to prevent nail pops from coming back is to replace the original nails with coarse-thread drywall screws during the repair. Screws grip the framing far more aggressively than nails and resist the backing-out motion caused by wood movement. Adding two new screws near every original pop location, one above and one below, anchors the drywall panel firmly enough that seasonal wood movement can no longer push fasteners outward. Homes in Lexington and Red Bank that experience repeated nail pops in the same spots should also check those areas for signs of framing that may be settling or warping.
Should you sand between coats of joint compound on nail pop repairs?
Yes, you should lightly sand between coats of joint compound on nail pop repairs. A light pass with a fine-grit sanding sponge between the first and second coat knocks down any ridges, air bubbles, or high spots left by the putty knife. This gives the second coat a smoother base to bond to and reduces the amount of final sanding required after the last coat dries. Use light pressure with the sanding sponge and wipe away all dust with a damp cloth before applying the next coat. Never apply a new coat of compound over sanding dust.
When should you call a professional for drywall nail pop repairs?
Call a professional for drywall nail pop repairs when the pops are widespread across multiple rooms, when they keep returning in the same spots after you have already fixed them, when you see cracks radiating outward from the pops rather than just a simple dimple, or when the damage extends to water staining, ceiling sag, or visible framing movement. These signs can point to structural settling or moisture issues that go beyond a surface repair. In the Lexington, SC area, homes near Lake Murray that experience ground movement or foundation settling may develop nail pops as a symptom of a deeper issue that needs a professional assessment before any cosmetic repairs are made.
Does fixing nail pops require priming before painting?
Yes, fixing nail pops requires priming the patched area before painting. Spackle and joint compound are both porous and absorb paint at a different rate than the sealed wall surface around them. Applying finish paint directly over an unprimed patch causes that spot to look dull, flat, or slightly different in sheen from the rest of the wall, an effect called “flashing.” A coat of shellac-based spot primer or PVA drywall primer on every patched area seals the surface and ensures the finish coat dries evenly and looks uniform from edge to edge.
Can ceiling nail pops be fixed the same way as wall nail pops?
Yes, ceiling nail pops can be fixed using the same basic steps as wall nail pops, but the work is more physically demanding because you are working overhead. Use all-purpose joint compound rather than lightweight spackle for ceiling repairs because compound has better adhesion and blending ability on horizontal surfaces. Apply thinner coats than you would on a wall to reduce the risk of compound sagging before it sets. A step stool or ladder that brings your eyes level with the ceiling surface makes it easier to feather the patch smoothly and catch any ridges or low spots before the compound dries.
Final Thoughts
Nail pops are a normal part of owning a home, but they are never something to paint over and ignore. The repair process is straightforward, the materials cost very little, and the results last for years when the work is done correctly. The key is always the same: anchor the drywall first with new screws, fill the dimple with thin coats of the right compound, sand it perfectly flush, prime it, and then paint. Every step matters, and skipping the fastener step means the pop will be back before your next painting project rolls around.
South Carolina’s climate puts real stress on wood framing throughout the year, which means Lexington homeowners are more likely than those in drier climates to encounter recurring nail pops. Getting ahead of them before a paint job and fixing them the right way the first time is always the smarter approach. A smooth, properly prepped wall makes a fresh coat of paint look like a professional result rather than a cover-up, and that difference is exactly what buyers, guests, and anyone who spends time in your home will notice immediately.
Ready for walls that look smooth, sharp, and freshly finished from floor to ceiling?
The team at Soda City Painting serves homeowners throughout Lexington, Red Bank, Gilbert, and the Lake Murray area. We handle full surface prep including nail pop repairs, patching, priming, and finish painting so your walls look exactly as they should when the job is done. Call us at (803) 221-0771 or reach out online to schedule your free estimate today.
See what our full prep-to-paint process looks like on our interior painting services page, and find out why Lexington homeowners trust Soda City Painting for results that hold up season after season.