You paint a room like a professional by following a clear order: prep the surfaces first, prime where needed, paint the ceiling, then the walls, and finish with the trim and baseboards. According to Sherwin-Williams, the correct top-to-bottom sequence prevents drips on freshly painted surfaces and delivers a clean, polished finish. Over 60% of a professional painter’s time is spent on prep work, not the actual painting, according to Improovy. That prep work is the real difference between a DIY result that looks homemade and one that looks like a pro did it. This guide walks homeowners in Lexington, SC, and the Columbia area through every step so you can paint any room with confidence and get results that last.
What Is the Correct Order to Paint a Room?
The correct order to paint a room is ceiling first, then walls, then trim and baseboards last. According to Sherwin-Williams, this top-to-bottom approach prevents drips and splatters from ruining surfaces you have already finished. Gravity works against you when painting overhead, so getting the ceiling done first keeps your walls clean.
According to Family Handyman, many professional painters actually follow a slightly different sequence for maximum efficiency: trim first, then ceiling, then walls. The logic is that it is easier and faster to tape off trim than to tape off entire walls. When you paint trim first, you do not need to be perfectly neat because the wall paint will cover any overlap. Once the trim dries for a full 24 hours, you tape it off and paint the ceiling and walls over it.
Both approaches work well. The key is to pick one order and stick with it. Jumping between surfaces creates messy edges, inconsistent texture, and more touch-up work at the end. Homeowners in Lexington who follow a clear plan from start to finish get much better results than those who wing it.
Regardless of which order you choose, always cut in the edges with a brush first, then roll the large areas while the cut-in paint is still wet. According to PaintRite Pros, rolling while the edges are wet eliminates the visible line where brush strokes meet roller texture, giving you a seamless, professional interior painting finish.
What Do Painters Lay Down Before Painting?
Painters lay down drop cloths, rosin paper, and painter’s tape before painting anything. Drop cloths protect floors and furniture from drips, splatters, and spills. Painter’s tape masks off edges along trim, baseboards, ceilings, window frames, and outlet covers to create sharp, clean lines where two colors or surfaces meet.
According to Family Handyman, canvas drop cloths are the best choice for floors because they are durable, absorbent, and stay in place without taping. Plastic drop cloths are cheaper but not absorbent, which means paint spills sit on top and can be tracked across the room if you step on them. Paper drop cloths tear easily and are best used to cover light fixtures or small furniture pieces.
Professional painters also remove all outlet covers, light switch plates, curtain rods, and wall hangings before laying anything down. According to This Old House, bundling each piece of hardware with its screws and labeling the location makes reassembly fast and easy once the paint dries. Removing hardware takes only a few minutes but eliminates hours of tedious taping and cutting around fixtures.
In homes across the Lake Murray area and Lexington, many rooms have ceiling fans and decorative light fixtures that should be removed or wrapped in plastic before painting. Taking 30 minutes to properly protect the room before you open the first paint can saves hours of cleanup later.
What Gets Painted First, Ceiling or Walls?
The ceiling gets painted first, before the walls. According to Taskrabbit, painting the ceiling first allows you to work from the top down, which means any drips or splatters from overhead work will not ruin your freshly painted walls. It also makes cutting in the ceiling edge much simpler because you do not need a perfect line along the wall. Any overlap onto the wall will be covered when you paint the walls next.
According to Benjamin Moore, the best technique for ceilings is to cut in the edges first with a 2.5-inch angled brush, then switch to a roller with an extension pole to cover the flat surface. Use flat or matte ceiling paint because it hides imperfections and does not reflect light in distracting ways. Roll in one consistent direction for an even finish.
If the ceiling needs a second coat, wait 2 to 4 hours for the first coat to dry, then apply the second coat in the opposite direction from the first. According to Sherwin-Williams, this crisscross technique reduces lap marks and provides more even coverage. Always check the drying time on the paint label because humidity and temperature affect how fast paint cures.
Homes in the Columbia area with higher humidity may need longer drying times between coats, especially during summer months. Running a fan or turning on the HVAC system helps air circulate and speeds up drying.
How Do I Get a Perfect Line Between My Wall and Ceiling?
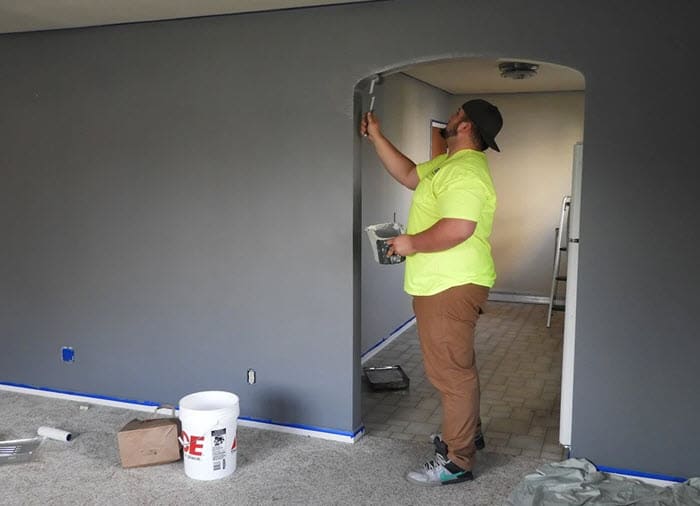
You get a perfect line between your wall and ceiling by using high-quality painter’s tape, a steady angled brush, and the right cutting-in technique. According to This Old House, the key is to use a 2.5-inch angled sash brush and load it with a moderate amount of paint. Too much paint causes drips and bleeding under the tape. Too little leaves thin, streaky coverage.
Apply painter’s tape along the ceiling edge where it meets the wall. Press the tape firmly into place with a putty knife or the edge of a credit card to seal it against the surface. According to The Home Depot, pressing tape tightly prevents paint from seeping underneath, which is the most common cause of blurry, uneven lines.
For textured ceilings, a trick from The Home Depot works well: run a screwdriver or flat tool along the ceiling edge to create a small, smooth groove where the tape can stick to a flat surface. This tiny step makes a huge difference in tape adhesion on popcorn or knockdown ceilings that are common in many Lexington and Columbia homes.
If you prefer to cut in freehand without tape, hold the brush at a slight angle and draw a slow, steady line about 1/8 inch away from the ceiling. Then come back and close that gap with a second careful pass. This takes practice, but experienced painters can achieve a razor-sharp line without any tape at all.
Walls that need repair before painting should be patched and sanded smooth first. Drywall repair and painting services handle everything from nail pops to larger holes so the surface is ready for a flawless finish.
What Not to Do When Painting a Room?
The biggest things not to do when painting a room are skipping prep work, using cheap tools, overloading the roller, rushing between coats, and painting in poor lighting. According to Sherwin-Williams, using the wrong amount of paint on a roller or brush is one of the most common mistakes homeowners make. Too much paint causes drips, splatters, and an uneven texture. Too little paint creates thin spots that require extra coats.
Never skip surface preparation. According to PrepSmart Painting, paint will not stick to dirty, greasy, or glossy surfaces. Dust, grime, and residue prevent proper adhesion, which causes chipping and peeling within months. Always clean walls with a damp cloth, patch holes with spackling compound, sand rough spots, and prime problem areas before applying any topcoat.
Do not rush drying time between coats. According to Hoosier Boys Painting, applying a second coat before the first is fully dry causes peeling, bubbling, and an uneven finish. Most latex paints need 2 to 4 hours between coats. Check the label on your specific paint for exact times.
Never paint in dim lighting. According to Family Handyman, natural daylight is the best light for painting because it shows the true color and reveals any missed spots, thin areas, or drips. If you paint at night under artificial light, you may not see problems until the next morning when sunlight hits the walls.
Do not use cheap brushes and rollers. According to The Painting Pros, frayed bristles leave streaks and shed hairs into the paint. A quality angled brush and a good roller cover with the correct nap length produce a smoother, more professional finish with less effort.
Is It Better to Roll or Spray Paint a Room?
It is better to roll paint for most DIY room painting projects because rolling is easier, produces less mess, and wastes less paint than spraying. According to Nash Painting, rollers provide smooth, even results with less effort on large flat surfaces like walls and ceilings. Rolling also transfers paint directly to the surface with minimal waste, unlike spraying which creates overspray that can land on floors, furniture, and fixtures.
Spray painting is faster for covering large areas and produces an ultra-smooth finish with no roller texture. According to This Old House, professional painters often use sprayers for new construction, empty rooms, or exterior projects where masking is simpler. However, spraying requires extensive prep work. Every surface you do not want painted must be covered with plastic or paper because the fine mist travels far.
According to Bernardo’s Painting, spray painting uses 20% to 30% more paint than rolling due to overspray. It also requires more expensive equipment, more setup time, and more cleanup. For a homeowner painting one or two rooms in an occupied house, rolling is almost always the better choice.
The best approach for most rooms is a combination: use a brush for cutting in edges and a roller for walls and ceilings. Professional house painting crews across the Lexington area use this hybrid method on nearly every residential project because it balances speed, precision, and a clean finish.
What Color Makes a House Look Expensive?
The colors that make a house look expensive are warm whites, soft grays, greige (gray-beige blend), navy blue accents, and muted earth tones. Neutral colors with warm undertones create a polished, sophisticated look that photographs well and appeals to a wide range of people. According to a Zillow Paint Color Analysis that examined data from over 32,000 home listing photos, certain paint colors can directly affect a home’s sale price.
White remains the most popular choice for interiors that feel high-end. Shades like Benjamin Moore’s Chantilly Lace, Simply White, or Sherwin-Williams’ Alabaster give rooms a bright, airy feel that looks expensive without being cold. Warm whites with yellow or pink undertones feel inviting, while cool whites with blue or green undertones feel crisp and modern.
Greige, which blends gray and beige, is a top pick for homeowners in Lexington and the Columbia area who want a neutral that works with both warm and cool furnishings. It feels current without being trendy, which is important for a color that needs to look good for years.
According to Angi, interior painting delivers an average return on investment of 107%. Choosing the right color is a big part of that ROI. Bold, dated, or overly personal colors can actually lower a home’s perceived value, while fresh neutrals make every room feel clean, updated, and move-in ready.
What Color Is Replacing Gray in Home Design?
The color replacing gray in home design is warm white, greige, and soft earthy neutrals like taupe, mushroom, and warm beige. After more than a decade of cool grays dominating interior design trends, homeowners are shifting toward warmer tones that feel cozier and more inviting. According to Sherwin-Williams, their recent Colors of the Year have consistently leaned warm, reflecting this industry-wide shift away from cool gray.
Greige sits right at the intersection of gray and beige and works as a bridge between the two eras. It keeps the sophistication of gray while adding warmth that cool grays lack. Warm whites like Benjamin Moore’s White Dove or Sherwin-Williams’ Alabaster have also surged in popularity because they pair well with natural wood tones, warm metals, and organic textures.
Homes in the Lexington and Red Bank area that still have cool gray walls from the 2015 to 2020 trend are starting to look dated. A fresh coat of warm white or greige instantly updates the space and appeals to current buyer preferences without being so trendy that it ages quickly.
If you are painting multiple rooms the same color, stick with one neutral that flows throughout the home. This creates a cohesive, open feel that makes every room look larger. A residential painting team can help you choose the perfect shade for your home’s lighting and layout.
Which Color Is Most Attractive for a Bedroom?
The most attractive color for a bedroom is a soft, calming tone like light blue, sage green, warm white, or lavender. Bedrooms are spaces for rest and relaxation, so colors that lower visual stimulation and promote calm work best. According to color psychology research cited by multiple design publications, blue tones are associated with lower heart rates and reduced anxiety, making them a top choice for bedrooms.
Light sage green has become one of the most popular bedroom colors in recent years. It brings a natural, organic feel that connects indoor spaces to the outdoors. Lavender is another strong choice, especially for secondary bedrooms and guest rooms, because it feels soothing without being cold.
For master bedrooms, warm whites and soft taupes create an elegant, spa-like atmosphere that pairs well with layered bedding, warm wood furniture, and ambient lighting. These neutrals also give homeowners in Gilbert and Lake Murray the flexibility to change decor without repainting.
Avoid bright, stimulating colors like red, orange, or bright yellow in bedrooms. While these colors have their place in kitchens and dining rooms, they are too energizing for a room designed for sleep. Dark, moody colors like deep navy or charcoal can work in large bedrooms with plenty of natural light, but they make small bedrooms feel cramped and cave-like.
What Is the 3-5-7 Rule in Decorating?
The 3-5-7 rule in decorating is a design principle that says items grouped in odd numbers, specifically 3, 5, or 7, are more visually appealing than items in even numbers. Odd groupings create a sense of movement and asymmetry that the eye finds naturally interesting. This rule applies to everything from throw pillows on a couch to picture frames on a wall to paint colors in a room’s palette.
When it comes to painting, the 3-5-7 rule helps homeowners choose a color scheme that feels intentional and cohesive. Pick 3 colors for a room: a dominant wall color (about 60% of the room), a secondary color for accents like trim or an accent wall (about 30%), and a third color for small pops through decor, pillows, or artwork (about 10%). This 60-30-10 approach, combined with the odd-number rule, creates balance without being boring.
For homes in the Lexington area, applying this rule might look like warm white walls (60%), dark navy trim on a built-in bookcase (30%), and brass hardware and warm-toned artwork (10%). The odd-number grouping makes each element stand out while still feeling like part of a whole. This principle works in every room, from bedrooms to living spaces to kitchens.
What Do Professional Painters Use to Prep Walls?
Professional painters use spackling compound, sandpaper, TSP cleaner, caulk, primer, painter’s tape, and drop cloths to prep walls before painting. According to This Old House, proper wall preparation is the single most important step in achieving a professional-quality finish. Every crack, hole, and imperfection that is not fixed before painting will show through the finished coat.
The prep process starts with cleaning. Pros wipe down walls with TSP (trisodium phosphate) or a mild detergent to remove dust, grease, and grime. Kitchens and bathrooms need extra attention because cooking oils and moisture leave invisible films that prevent paint from sticking.
Next, they repair all damage. Small nail holes and hairline cracks get filled with lightweight spackling compound and a putty knife. Larger holes or damaged areas may need a drywall patch. After the filler dries, they sand it smooth with 220-grit sandpaper so it blends invisibly into the surrounding wall. According to Family Handyman, unsanded patches cause “flashing,” where repaired spots look different from the rest of the wall because the filler absorbs paint differently than the surrounding surface.
Priming patched areas, or priming the entire room when needed, seals everything to an even porosity so the topcoat goes on uniformly. Homes with older walls or extensive repairs benefit from a full coat of primer. Sheetrock install and repair services handle major wall damage that goes beyond simple patching.
Paint Finish Guide by Room
| Room | Recommended Finish | Why This Finish Works |
|---|---|---|
| Ceiling | Flat / Matte | Hides imperfections, absorbs light, no distracting glare |
| Living Room | Eggshell / Satin | Slight sheen, easy to clean, hides minor flaws |
| Bedroom | Eggshell / Matte | Low sheen for relaxing feel, hides wall texture |
| Kitchen | Satin / Semi-Gloss | Resists moisture, grease, and stains; easy to wipe |
| Bathroom | Semi-Gloss | Moisture-resistant, mold-resistant, highly washable |
| Hallway / Kids’ Room | Satin / Semi-Gloss | Durable, scuff-resistant, cleans easily |
| Trim / Baseboards / Doors | Semi-Gloss / Gloss | Hard-wearing, easy to clean, crisp appearance |
Sources: Sherwin-Williams (finish recommendations), Benjamin Moore (application guidelines), Family Handyman (room-by-room advice), HomeAdvisor (sheen pricing data)
What Is the Best Paint Brand for Interior Walls?
The best paint brands for interior walls are Sherwin-Williams, Benjamin Moore, and Behr. All three offer excellent coverage, durability, and color consistency. The right choice depends on your budget, the specific product line, and personal preference.
Sherwin-Williams Duration and Emerald lines are favorites among professional painters because of their superior coverage and self-leveling properties. According to Improovy, premium Sherwin-Williams paint costs $50 to $70 per gallon but often requires fewer coats than cheaper alternatives, making it cost-effective in the long run.
Benjamin Moore Regal Select and Aura are also top-tier options. Aura is known for its color depth and one-coat coverage on many colors. According to Benjamin Moore, their paints use proprietary Gennex Color Technology for richer, truer color that stays consistent over time.
Behr offers strong mid-range options available exclusively at The Home Depot. Behr Marquee and Behr Dynasty provide good coverage at a lower price point, typically $35 to $55 per gallon. According to HomeAdvisor, Behr is a solid choice for DIY homeowners who want quality results without the premium price.
Professional painters in the Lexington and Columbia area most often use Sherwin-Williams or Benjamin Moore because of the contractor discounts, wide color selection, and consistent batch-to-batch quality. Whatever brand you choose, buying the highest quality line you can afford almost always saves money compared to needing extra coats with a cheaper product.
What Are the Latest Room Painting Trends?
The latest room painting trends include warm whites, earthy neutrals, bold accent walls, color-drenched rooms, and nature-inspired greens. The shift away from cool grays continues, with homeowners choosing colors that feel cozy, organic, and grounded. According to Sherwin-Williams and Benjamin Moore color trend reports, the move toward warmth and natural tones has been building for several years and shows no signs of slowing down.
Color drenching is one of the boldest trends right now. This technique involves painting the walls, trim, ceiling, and doors the same color to create an immersive, cocooning effect. It works especially well in small rooms like powder rooms, home offices, and bedrooms. Rich greens, deep blues, and warm terracotta tones are popular choices for this approach.
Nature-inspired palettes are everywhere. Sage green, forest green, warm clay, and sandy beige bring the outdoors in and create a calming connection to nature. These colors pair beautifully with natural wood tones, rattan, and linen textures that are also trending in home decor.
Painted ceilings are another growing trend. Instead of default white, homeowners are using soft sky blue, pale pink, or a deeper shade of the wall color on the ceiling to add unexpected visual interest. This works well in bedrooms and dining rooms where you want a finished, designer look.
Homeowners in the Gilbert and Red Bank communities who want to update their homes with current trends can explore options with a local painting team that knows what works in South Carolina’s natural light conditions. Bundling an interior refresh with exterior painting gives the whole property a cohesive, updated look.
How Do You Avoid Lap Marks When Painting?
You avoid lap marks when painting by maintaining a “wet edge” at all times. Lap marks are those ugly stripes that appear when you roll over paint that has already started to dry. According to Family Handyman, the solution is to always overlap your roller into the previous stroke while the paint is still wet. Never let the edge of a section dry before you roll the next section beside it.
Work in manageable sections of about 4 to 6 feet wide and roll from floor to ceiling in each section. Move quickly from one section to the next. Reload the roller often so it is always at least half loaded with paint. A nearly dry roller drags across the surface and creates uneven texture.
According to Family Handyman, keeping the open side of the roller frame facing the area you already painted puts less pressure on that side. This reduces the buildup of paint ridges along the roller’s edge. If you do notice ridges forming, go back over them immediately with light, even pressure before the paint starts to set.
For ceilings and extra-tall walls where you cannot maintain a wet edge across the entire surface, feather out the paint at the edges. Apply a thinner coat along the stopping point so there is no hard line of built-up paint. When you start the next section, overlap into that feathered edge. According to Sherwin-Williams, applying the second coat in the opposite direction from the first coat also helps eliminate any remaining lap marks.
How Long Should You Wait Between Coats of Paint?
You should wait 2 to 4 hours between coats of latex paint in most conditions. According to Sherwin-Williams, always check the specific drying time listed on your paint can because it varies by product, finish, temperature, and humidity. Some paints dry faster, while thicker or glossier formulas take longer.
Applying the second coat too soon is one of the most common painting mistakes. According to Hoosier Boys Painting, painting over a coat that is still tacky causes peeling, bubbling, and an uneven finish that looks worse than if you had applied only one coat. The paint needs time to fully cure and bond to the surface before another layer goes on top.
In humid climates like the Lexington and Columbia area, drying times can run longer, especially during summer. Running air conditioning or a dehumidifier helps speed up drying. Good airflow from fans or open windows (weather permitting) also makes a noticeable difference.
For oil-based paints and primers, wait a full 24 hours between coats. Oil-based products take much longer to cure than latex. If you are painting trim with an oil-based or alkyd paint, plan your schedule so the first coat has a full day to dry before you apply the second.
How to Clean Up After Painting a Room?
You clean up after painting a room by removing tape while the paint is nearly dry, washing brushes and rollers immediately, sealing leftover paint cans tightly, and reinstalling hardware and outlet covers once everything is fully cured. Cleanup is the last step, but doing it right protects your tools, your work, and your paint for future touch-ups.
According to Family Handyman, remove painter’s tape when the paint is nearly dry but not fully cured. Score along the tape’s edge with a flexible putty knife before peeling to prevent the tape from pulling off paint with it. If you leave tape on too long, it bonds to the surface and becomes much harder to remove cleanly.
Wash latex paint out of brushes and rollers with warm, soapy water immediately after finishing. Work the bristles by hand under running water until the water runs clear. According to The Painting Pros, cleaning tools right away keeps them in good condition for the next project. Dried paint in a brush or roller cover ruins it permanently.
Seal leftover paint cans tightly by placing plastic wrap over the opening before hammering the lid shut. Store paint in a cool, dry place away from extreme temperatures. Properly stored latex paint lasts up to 10 years. Keep a photo of the paint label on your phone so you always know the exact color and brand for future touch-ups.
Homeowners who also want to refresh outdoor surfaces after finishing the interior can extend the fresh look to their porch or decks, docks, and fences for a complete property transformation.
What Devalues a House the Most?
The things that devalue a house the most are deferred maintenance, bold or dated paint colors, dirty or scuffed walls, and visible DIY mistakes. According to HomeLight, homes with peeling paint, bold personal color choices, and worn-out interiors signal to buyers that the property has not been well maintained, which lowers perceived value and sale price.
Interior paint plays a direct role in how buyers feel the moment they walk through the door. According to Angi, interior painting delivers a 107% ROI, but that return assumes the colors are neutral and the work is professionally done. Bright red dining rooms, dated beige from the early 2000s, and neon accent walls can actually hurt resale value because buyers see future projects instead of a move-in-ready home.
According to Opendoor, 63% of real estate agents recommend painting interior walls before listing a home. Fresh, neutral paint is one of the cheapest ways to boost a home’s appeal. For homeowners in Lexington who are preparing to sell, a full interior repaint in warm white, soft gray, or greige creates a clean backdrop that photographs well and helps buyers imagine their own furniture and style in the space.
Skipping exterior maintenance is equally damaging. Peeling paint on the outside signals neglect and drives buyers away before they even step inside. A combined interior and exterior painting refresh before listing is one of the smartest investments a seller can make.
How to Increase Home Value by $50,000?
You increase home value by $50,000 by combining several high-ROI improvements: fresh interior and exterior paint, updated kitchen and bathroom fixtures, new front door, improved landscaping, and modern lighting. No single project adds $50,000 on its own, but a strategic combination of affordable upgrades can get you there.
According to the Remodeling Magazine Cost vs. Value Report, a new garage door returns over 90% of its cost. A minor kitchen remodel returns about 96%. And according to HomeLight, repainting interior walls adds an average of 5% to a home’s value with a 107% ROI. On a $400,000 home, that 5% equals $20,000 in added value from paint alone.
Fresh exterior paint adds another 2% to 5% to a home’s value, according to Opendoor. Combine that with landscaping improvements (which can add 5% to 10% according to the National Association of Realtors) and updated fixtures, and you are well on your way to that $50,000 target.
The key is focusing on cosmetic, high-impact projects rather than expensive structural renovations. A full commercial or residential painting makeover, new hardware, fresh caulk, and clean landscaping create the impression of a well-maintained home that commands a higher price. Homeowners across the Columbia metro area who are planning to sell in the next 12 months should start with paint because it delivers the biggest visual impact per dollar spent.
Frequently Asked Questions
How Long Does It Take to Paint a Room in Lexington, SC?
It takes a professional crew about 4 to 8 hours to paint a standard bedroom in Lexington, SC, including prep, two coats, and cleanup. A full-day project for a pro can take a DIY homeowner an entire weekend. Wall condition, room size, ceiling height, and the number of doors and windows all affect the timeline. Larger rooms with vaulted ceilings or extensive trim work take longer.
Do I Need to Wash Walls Before Painting?
Yes, you need to wash walls before painting. Dust, grease, and grime prevent paint from sticking properly, which leads to peeling and chipping. Use a damp cloth or sponge with warm water to wipe down the walls from top to bottom. Kitchens and bathrooms may need a mild detergent or TSP solution to cut through grease buildup. Let walls dry completely before priming or painting.
Can I Paint a Room in One Day?
Yes, you can paint a room in one day if the walls are in good condition and you only need two coats. Start early in the morning with prep work and priming. Apply the first coat by mid-morning. Let it dry for 2 to 4 hours. Apply the second coat in the afternoon. By evening, you can remove tape and begin cleanup. Rooms that need extensive patching or priming may spill over into a second day, especially in the humid climate around Columbia and Lake Murray.
What Roller Nap Should I Use for Smooth Walls?
You should use a 3/8-inch nap roller for smooth drywall. According to Sherwin-Williams, a shorter nap deposits a thinner, smoother layer of paint that minimizes roller texture. For lightly textured walls, move up to a 1/2-inch nap. For heavily textured surfaces like knockdown or orange peel, use a 3/4-inch nap. Using the wrong nap is a common mistake that affects how much paint you use and how the finish looks.
Should I Use Painter’s Tape or Cut In Freehand?
You should use painter’s tape if you are a beginner or want guaranteed clean lines. Freehand cutting in is faster but requires a steady hand and practice. According to This Old House, professional painters often cut in freehand because they have years of experience. For homeowners painting their first or second room, quality painter’s tape along ceilings, trim, and baseboards is the safest way to get sharp, professional-looking edges.
How Do I Avoid Brush Marks on Trim?
You avoid brush marks on trim by using a high-quality angled brush, loading it with a moderate amount of paint, and applying long, smooth strokes in one direction. According to Family Handyman, the key is to lay paint down quickly and avoid going back over areas that have started to dry. Overbrushing causes ridges and visible brush lines. For an ultra-smooth finish on doors and trim, some professionals use a small foam roller after brushing to eliminate texture.
What Is the Best Time of Year to Paint a Room in Lexington?
The best time of year to paint a room in Lexington, SC, is fall or winter when humidity is lower and interior drying conditions are ideal. According to HomeAdvisor, low humidity helps paint dry faster and cure more evenly. Painters also tend to have more availability during cooler months because exterior projects slow down. Spring and summer work fine too as long as you run air conditioning to control indoor humidity in the Columbia area.
Final Thoughts
Painting a room like a professional comes down to preparation, the right tools, and a clear plan. Start with thorough surface prep. Follow the correct painting order: ceiling first, then walls, then trim. Use quality paint and brushes. Maintain a wet edge to avoid lap marks. Wait for full drying between coats. Clean up carefully. These are the same steps that professional crews follow on every project, and they are the reason a pro finish looks so different from a rushed DIY job.
For homeowners in Lexington, SC, and the surrounding communities of Columbia, Red Bank, Gilbert, and Lake Murray who want flawless results without the learning curve, Soda City Painting delivers high-end residential finishes on every project. From a single accent wall to a full-home transformation, the right painting team makes every brushstroke count.
Ready to give your home the professional finish it deserves? Call (803) 221-0771 or visit the interior painting services page to schedule your free, no-obligation estimate today. Fresh paint changes everything, and it starts with one call.