To prep walls for painting the right way, you need to follow these steps in order: clear the room, inspect the walls for damage, patch holes and cracks, sand the surface smooth, clean the walls, apply painter’s tape, lay drop cloths, and prime. Skipping any of these steps leads to peeling, bubbling, and a paint job that fails years before it should. According to professional painting experts, surface preparation accounts for roughly 80% of a quality paint job. This guide walks homeowners in Lexington, SC through every step so your next painting project looks flawless and lasts for years.
In What Order Should I Prep My Walls for Painting?
The order you should prep your walls for painting is: clear the room, inspect for damage, patch and repair, sand, clean, tape, lay drop cloths, and prime. Each step builds on the one before it. Doing them out of order creates problems. For example, sanding before patching leaves unrepaired holes. Cleaning before sanding leaves dust on the walls. Following the right sequence saves time and produces better results.
Here is the full step-by-step breakdown that professional painters in the Lexington, SC area follow on every interior painting project.
Step 1: Clear the Room
Move all furniture out of the room or push it to the center and cover it with drop cloths or plastic sheeting. Remove all wall art, mirrors, curtains, and shelving. Take off electrical outlet covers, light switch plates, and vent covers. Use a screwdriver to remove them, not a knife, which can damage the plate or the wall. Removing these items gives you full access to every inch of the wall and prevents paint splatter on things that are hard to clean.
Step 2: Inspect the Walls
Grab a bright work light or flashlight and hold it at a low angle against the wall. This “raking” technique casts shadows across any dents, nail pops, cracks, or bumps that would otherwise be invisible. Mark each flaw with a small piece of painter’s tape so you can find them again when you start patching. Check corners, edges around door frames, and the areas around windows where settling can cause cracks over time.
Homes in the Lexington and Columbia area that were built in the 1990s or earlier may have multiple layers of old paint, plaster patches, or even wallpaper seams hidden beneath the surface. A thorough inspection catches these issues before they become problems under a fresh coat of paint.
Step 3: Patch Holes and Cracks
Fill small nail holes, dents, and dings with lightweight spackle and a putty knife. For larger holes (bigger than a quarter), use a drywall patch kit with mesh tape and joint compound. Apply the compound in thin layers, letting each layer dry completely before adding the next. This prevents shrinking and cracking in the repair.
For cracks along corners or where walls meet the ceiling, use paintable acrylic caulk. Run a smooth bead along the crack, then smooth it with a wet finger or a damp rag. Caulk fills flexible gaps that spackle cannot handle because caulk moves with the house while spackle does not. Homes across the Red Bank and Gilbert areas with older sheetrock may need more extensive repair before painting.
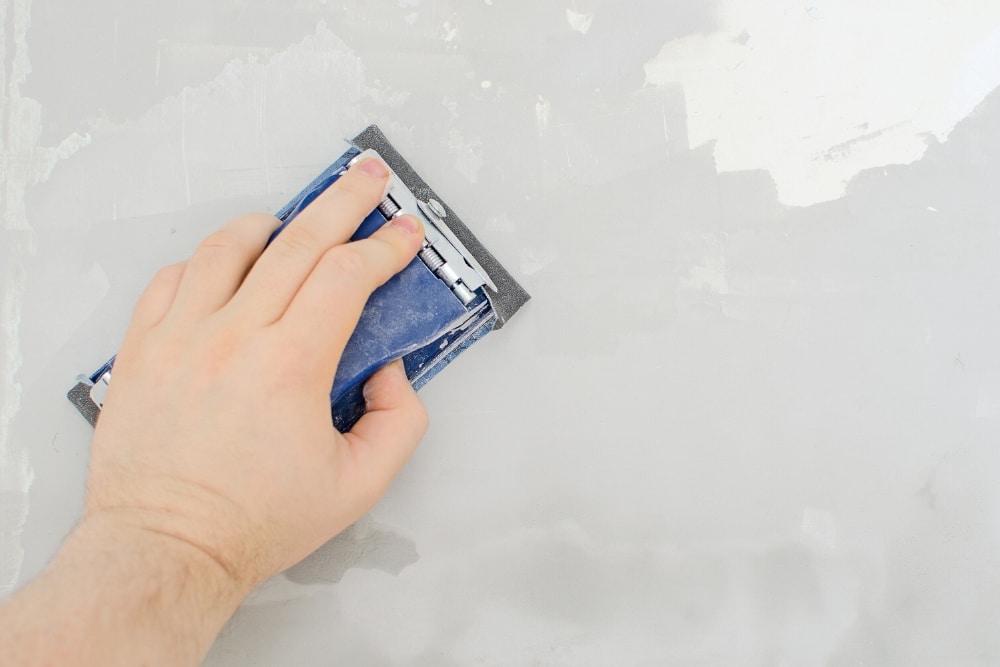
Step 4: Sand the Surface
Once all patches and repairs are fully dry, sand them smooth with 120 to 150 grit sandpaper or a sanding sponge. The goal is to make the patched areas level with the surrounding wall so they disappear under paint. After sanding patches, lightly scuff the entire wall with 150 to 220 grit sandpaper. This light sanding creates a slightly rough texture that helps new paint bond to the old surface.
If the existing paint is glossy or semi-gloss, sanding is especially important. According to Benjamin Moore, smooth and glossy surfaces must be dulled with fine-grit sandpaper before repainting to allow proper adhesion. Skipping this step is one of the most common reasons paint peels off previously painted walls.
Step 5: Clean the Walls
After sanding, the walls will be covered in a fine layer of dust. Wipe down the entire surface with a barely damp microfiber cloth or a dry Swiffer-style duster. For kitchens and bathrooms where grease and soap residue build up, use a solution of warm water and a mild degreasing detergent like TSP (trisodium phosphate). Rinse with clean water and let the walls dry completely before moving forward.
According to Sherwin-Williams, cleaning walls with a mixture of lukewarm water and mild soap removes grime, cobwebs, dust, and stains that prevent paint from sticking. This step is especially important in humid climates like Lexington, SC, where mildew can grow on walls without being immediately visible. Never paint over mildew. It will grow right through the new paint.
Step 6: Apply Painter’s Tape
Apply painter’s tape along the ceiling line, baseboards, window trim, and door frames. Press the tape firmly with a putty knife or credit card to seal the edges and prevent paint from bleeding underneath. Make sure the walls are completely dry before taping, because tape does not stick well to damp surfaces.
Use quality painter’s tape, not cheap masking tape. Standard masking tape can leave residue, bleed, and tear when removed. Professional-grade painter’s tape from brands like FrogTape or ScotchBlue creates clean, crisp lines and peels off without damaging the surface underneath.
Step 7: Lay Drop Cloths
Spread canvas or heavy-duty plastic drop cloths across the entire floor. Canvas cloths are better because they absorb drips instead of letting paint puddle and get tracked around. Tape the edges of the drop cloths to the baseboards so they stay in place. Cover any furniture remaining in the room with plastic sheeting.
Step 8: Prime the Walls
Apply primer to any bare drywall, patches, repaired areas, stains, or surfaces where the old paint has been removed. If you are making a dramatic color change, prime the entire wall. According to KILZ, primer creates an even surface, improves paint adhesion, blocks stains, and helps the topcoat show its true color. Skipping primer on patched areas will cause those spots to absorb paint differently and show through as dull patches called “flashing.”
Use a high-quality primer that matches your topcoat type. If you are using latex paint, use a latex primer. For stain-blocking, shellac-based primers seal the toughest stains. Let the primer dry fully before applying your first coat of paint. For homeowners in the Lexington area who need drywall repair and painting done together, having a professional handle both ensures the repairs are properly primed and invisible under the final coat.
What Are the Most Common Painting Mistakes?
The most common painting mistakes are skipping surface preparation, not using primer, choosing the wrong paint finish, using cheap brushes and rollers, applying too few coats, and painting in poor conditions. According to professional painting contractors, skipping prep is the number one reason paint jobs fail prematurely.
Other frequent mistakes include not stirring the paint before use (which causes uneven color and sheen), overloading the roller (which causes drips), painting over damp surfaces (which causes peeling), and removing painter’s tape after the paint has fully dried (which can pull the new paint off with it). Each of these errors is avoidable with a little patience and the right technique.
According to data from BEHR Pro, 63% of all painting work in 2023 was handled by professionals. Many homeowners who switch from DIY to professional painting do so after a bad experience caused by one or more of these common mistakes. Professional painters in the Columbia area know how to avoid every one of these pitfalls because they see the consequences of skipped prep work every day.
Can I Paint Straight Onto Drywall?
No, you should not paint straight onto bare drywall without priming first. Unprimed drywall is extremely porous and will absorb paint unevenly, creating a blotchy, patchy finish. The paper face of drywall soaks up moisture from the paint, which leads to poor adhesion, uneven sheen, and a rough texture that no amount of additional coats will fix.
According to Benjamin Moore, priming bare drywall is a critical step that seals the porous surface and creates a uniform base for your topcoat. Drywall primer fills the tiny pores in the paper and joint compound, preventing them from pulling moisture out of the paint. This results in smoother, more even coverage and a professional-looking finish.
New construction homes and renovation projects in the Lexington, SC area always require primer on new drywall. If you have recently had sheetrock installed or repaired, two coats of drywall primer are recommended before any paint goes on the walls.
What Happens If You Paint Over Unprimed Drywall?
If you paint over unprimed drywall, the paint will absorb unevenly into the surface. Some areas will look flat and dull while others look shinier, creating a patchy, unprofessional appearance. The joint compound areas where seams and screws were filled will absorb paint differently than the surrounding paper face, making every seam and patch visible.
Paint applied directly to unprimed drywall also peels and flakes more easily because it has not bonded properly to the surface. Touch-ups on unprimed drywall are nearly impossible to blend because each area absorbs paint at a different rate. The only real fix for painting over unprimed drywall is to go back, prime the entire surface, and repaint, which doubles your time and material costs.
Can I Just Paint Over Old Paint?
Yes, you can paint over old paint if the existing paint is in good condition with no peeling, cracking, or heavy chalking. You still need to clean the surface, sand any glossy areas to create tooth for the new paint, and prime any bare spots or stains. If the old paint is failing in any way, you must scrape, sand, and repair the surface before repainting.
According to Benjamin Moore, painting over cracked or flaking paint is a bad idea. The new paint will adhere to the old flakes, not to the wall itself, and the entire surface will fail again quickly. Remove all loose paint by scraping and sanding until you reach a solid, stable surface. Then prime and paint as normal.
Homeowners in the Lake Murray and Chapin areas who are refreshing rooms that were painted years ago should test the existing paint first. Press a piece of painter’s tape firmly to the wall and pull it off. If paint comes with it, the old paint needs to be addressed before new paint goes on. A professional house painting team can assess the condition of your existing paint and recommend the right approach.
Can I Use Dawn to Wash Walls Before Painting?
Yes, you can use Dawn dish soap to wash walls before painting. A few drops of Dawn in a bucket of warm water creates an effective, gentle cleaning solution that removes dust, light grease, and grime without leaving a residue that interferes with paint adhesion. Dawn is a mild degreaser, which makes it a solid choice for most rooms.
For heavy grease buildup in kitchens, TSP (trisodium phosphate) or a TSP substitute is a stronger option. For bathrooms with mildew, a solution of one part bleach to three parts water kills mildew before painting. Always rinse the walls with clean water after using any cleaning solution and let them dry completely. Painting over soapy residue can prevent the paint from bonding properly.
Is Murphy’s Oil Soap Good for Cleaning Walls?
No, Murphy’s Oil Soap is not recommended for cleaning walls before painting. Murphy’s Oil Soap leaves a thin oily residue on the surface that can prevent paint from adhering properly. It is designed for cleaning finished wood surfaces, not for prepping walls for paint. Use plain water and mild dish soap or TSP instead for the best results.
What Is the 80/20 Rule in Painting?
The 80/20 rule in painting means that 80% of the work goes into preparation and only 20% goes into actually applying the paint. Professional painters spend the majority of their time cleaning, patching, sanding, priming, and taping before they ever open a can of paint. The prep work is what determines whether the paint job looks good and lasts for years or starts failing within months.
This rule is why DIY paint jobs often do not match professional results. Homeowners tend to rush through prep because they want to see color on the walls. But every minute spent on preparation pays off in a smoother, longer-lasting finish. According to the National Association of Home Builders, 87% of home sellers repaint at least one room before listing, and buyers can immediately tell the difference between a well-prepped paint job and one that was rushed.
What Not to Do When Painting a Wall
When painting a wall, do not skip primer, do not paint over dirty or damp surfaces, do not use cheap brushes and rollers, do not apply paint too thickly, and do not paint in extreme temperatures. Each of these mistakes leads to problems that are harder to fix than they are to prevent.
Do not overwork the paint. Once paint starts to dry on the wall, going back over it with a brush or roller creates visible marks and an uneven texture. Work in small sections and keep a “wet edge” so each new stroke blends smoothly into the previous one. Roll paint in a “W” or “M” pattern to distribute it evenly before filling in with straight vertical strokes.
Do not remove painter’s tape after the paint has fully dried and hardened. According to multiple industry sources, tape should be removed while the paint is still slightly tacky. Pulling tape off dried paint can tear the new paint film and leave a ragged edge. If the paint has already dried completely, score the edge of the tape with a sharp utility knife before removing it.
Do You Pull Painters Tape When It’s Wet or Dry?
You should pull painters tape when the paint is dry to the touch but not fully cured, which is usually about 30 to 60 minutes after the final coat. Pull the tape slowly at a 45-degree angle away from the painted surface. This timing gives you the cleanest edge because the paint has firmed up enough to hold its shape but is still flexible enough not to crack or tear.
If you wait too long and the paint dries completely, the dried paint can form a bond between the tape and the wall. Pulling the tape at that point can rip chunks of paint off with it. If you find yourself in this situation, use a sharp blade to score along the edge of the tape before peeling it away.
How Do Painters Get a Straight Edge?
Painters get a straight edge by “cutting in” with a high-quality angled brush. Professional painters load a 2 to 2.5 inch angled brush with paint, press the bristles against the wall at the ceiling or trim line, and drag the brush in a smooth, steady stroke. The angle of the brush creates a sharp line without tape. This technique takes practice but produces sharper, cleaner lines than tape alone.
For DIY painters who are not comfortable cutting in by hand, painter’s tape is the next best option. Apply the tape carefully, press the edges firmly to prevent bleed, and paint away from the tape edge (not toward it) to push paint into the wall instead of under the tape. The team at Soda City Painting cuts in by hand on every project for the fastest, cleanest results.
How Many Coats of Paint on Walls?
Two coats of paint on walls is the standard for a quality finish. One coat rarely provides complete, even coverage, especially when changing colors. Two coats build a thicker, more durable paint film that resists scuffs, stains, and fading better than a single coat. For dramatic color changes, such as going from dark to light, a third coat may be needed.
According to Sherwin-Williams, most of their product warranties require two coats over a properly primed surface. Applying only one coat can void the warranty and will almost certainly result in uneven color and poor durability. Each coat should dry completely before the next one is applied. Most latex paints are dry to the touch in one to two hours, but check the label for the manufacturer’s recommended recoat time.
Using premium paint from brands like Sherwin-Williams or Benjamin Moore can sometimes provide excellent coverage in two coats that budget paints cannot match in three or four. This is why professional residential painting crews invest in premium products. The better coverage saves time and delivers a finish that looks richer and lasts longer.
What Is the Best Time of Year to Paint?
The best time of year to paint interior walls is any time, because indoor temperature and humidity can be controlled. For exterior painting, late spring and early fall are ideal because temperatures are moderate and humidity is lower. The ideal temperature range for most latex paint is between 50 and 85 degrees Fahrenheit.
In Lexington, SC, interior painting can be done year-round. Exterior painting is best from April through early June and September through November, when temperatures are comfortable and rain is less frequent. Summer exterior painting is possible but requires working in the cooler morning and late afternoon hours to avoid extreme heat that causes paint to dry too fast.
How to Spot a Bad Paint Job
A bad paint job shows visible roller marks, brush strokes, drips, uneven color, lap marks, and rough texture. You can also spot a bad paint job by looking for paint on trim that should be clean, uneven lines where the wall meets the ceiling, patches that show through the paint as dull spots, and peeling or bubbling within the first year.
Run your hand across the wall. A good paint job feels smooth and uniform. A bad one feels rough, bumpy, or has raised ridges where the roller left too much paint. Look at the wall from different angles and in different lighting. Natural side light is the best way to reveal imperfections. If you can see every patch, seam, and repair through the paint, the prep work was not done properly.
According to a Zillow study, homes needing paint sold for 7% less than freshly painted comparable homes. Buyers notice bad paint jobs immediately. If you are preparing to sell your home in the Lexington or Columbia area, a professionally prepped and painted interior makes a measurable difference in how fast your home sells and how much you get for it.
Should You Caulk Between a Wall and a Ceiling?
Yes, you should caulk between a wall and a ceiling if there is a visible gap or crack. Over time, homes settle and shift, which can create small gaps where the wall meets the ceiling. These gaps look messy under fresh paint. A thin bead of paintable acrylic latex caulk fills the gap and creates a clean, seamless transition.
Apply the caulk after priming but before painting. Smooth the bead with a damp finger and wipe away any excess. Let the caulk dry according to the label directions before painting over it. This small step makes a big difference in the finished appearance of any room. Professional painters in the Lexington area caulk all wall-to-ceiling joints, wall-to-trim joints, and any gaps around windows and doors as a standard part of their prep process.
What Things in a House Should I Avoid Painting?
The things in a house you should avoid painting include functional hardware like door hinges, outlet covers (which should be removed), air vents and registers (which should be removed or taped), and most finished wood surfaces that have a natural stain or varnish you want to preserve. Avoid painting over mildew, water stains without primer, wallpaper (unless fully sealed and tested), and any surface that is wet or damp.
Also avoid painting exterior deck and fence surfaces with standard interior paint, which is not formulated for outdoor exposure. The same goes for porch floors and sheds, which need paints and stains specifically designed to handle UV rays, moisture, and temperature changes.
Prep vs. No Prep: Comparison Table
| Factor | With Proper Prep | Without Prep |
|---|---|---|
| Paint Lifespan | 7 to 10+ years | 1 to 3 years |
| Appearance | Smooth, even, professional | Patchy, rough, visible flaws |
| Paint Adhesion | Strong bond, no peeling | Weak bond, peeling within months |
| Coats Needed | 2 coats over primer | 3 to 4+ coats, still uneven |
| Touch-Up Success | Blends seamlessly | Stands out, often worse |
| Overall Cost | Higher upfront, lower long-term | Lower upfront, higher long-term |
Sources: Sherwin-Williams, Benjamin Moore, KILZ, CertaPro Painters, Expert Painting LLC. Data based on professional painter recommendations and industry best practices.
Why Hiring a Professional Matters for Prep Work
Prep work is the most time-consuming and least glamorous part of any painting project, but it is the part that matters most. Professional painters spend 60 to 80% of their total project time on preparation. They know exactly how to fill, sand, clean, and prime every type of surface for maximum adhesion and a flawless finish.
According to BEHR Pro, the professional painting market accounted for 63% of all painting work in 2023. That trend reflects the fact that homeowners increasingly trust professionals to handle the prep-heavy work that determines whether a paint job lasts 2 years or 10. The U.S. house painting market was valued at $24.4 billion in 2024, and that figure continues to grow as more homeowners invest in quality results.
For homeowners in Lexington, SC and surrounding areas, hiring a team that takes prep seriously is the best investment you can make in your home’s appearance and value. Commercial painting projects for offices, retail spaces, and restaurants depend on thorough preparation for lasting results.
The same high standards apply to commercial interior painting work, where clean lines and smooth finishes reflect directly on a business’s image.
Frequently Asked Questions
How Long Does It Take to Prep a Room for Painting in Lexington, SC?
It takes about 2 to 4 hours to prep a standard-sized room for painting in Lexington, SC. This includes moving furniture, patching, sanding, cleaning, taping, and priming. Rooms with heavy damage, old wallpaper, or multiple layers of paint may take longer. The humid climate in the Columbia area can also add drying time for spackle and primer, so plan an extra hour or two for materials to dry completely.
Can You Use Dawn Dish Soap to Wash Walls Before Painting?
Yes, you can use Dawn dish soap to wash walls before painting. Mix a few drops into a bucket of warm water and wipe the walls down with a soft sponge. Rinse with clean water and let the walls dry completely before priming or painting. Dawn is a mild degreaser that removes everyday dust and grime without leaving harmful residue.
What Should Not Be Done Before Painting Interior Walls?
You should not paint interior walls without cleaning them first, without sanding glossy surfaces, without patching holes and cracks, or without priming bare or repaired areas. You should also not paint over mildew, wet surfaces, or wallpaper without proper preparation. These shortcuts lead to peeling, bubbling, and a finish that looks bad and fails fast.
What Is the Hardest Color to Paint Over?
The hardest colors to paint over are deep reds, bright oranges, and dark blacks. Red pigment is especially stubborn and can bleed through multiple coats of paint and primer. When covering these colors with a lighter shade in a Lexington home, use a high-hide, stain-blocking primer and plan for two coats of primer plus two to three coats of finish paint.
Do House Painters Clean Walls Before Painting?
Yes, professional house painters clean walls before painting. Cleaning removes dust, cobwebs, grease, and other contaminants that prevent paint from bonding to the surface. Most professionals use a mild soap and water solution for general cleaning, TSP for heavy grease, and a bleach solution for mildew. This step is a non-negotiable part of professional prep in the Lexington and Columbia area.
What Are Two Common Mistakes Made During Drywalling?
Two common mistakes made during drywalling are not using enough joint compound to fully cover seams and fasteners, and not sanding the compound smooth before painting. Both mistakes leave visible bumps and lines that show through paint. Proper sheetrock installation and finishing requires multiple thin coats of compound with sanding between each coat to create a perfectly smooth surface.
What Is the First Thing You Do When Painting a Wall?
The first thing you do when painting a wall is inspect it for damage and clean it. Painting should never be the first step. All holes, cracks, and imperfections need to be patched and sanded. The wall needs to be free of dust, grease, and mildew. Then primer goes on before paint. Preparation always comes first.
Final Thoughts
Prepping walls for painting is the most important part of any painting project. It is not the most exciting step, but it is the one that separates a paint job that looks good for a decade from one that starts peeling within a year. Clean walls, smooth surfaces, proper priming, and quality materials are the foundation of every beautiful room.
If you are a homeowner in Lexington, SC, Red Bank, Gilbert, Lake Murray, or the greater Columbia area and you want your next paint job done right from the very first step, Soda City Painting is here to help. Our team handles every detail of prep work and painting so you get flawless results without the hassle. Call us today at (803) 221-0771 or visit our website to schedule your free estimate. The difference is in the prep, and we never skip a step.