Yes, you can repair drywall cracks in ceilings yourself, and most ceiling cracks are cosmetic rather than structural. The repair process involves cleaning the crack, widening it slightly, applying drywall tape and joint compound, sanding smooth, and repainting to match the existing ceiling. This guide covers every type of ceiling crack, what each one means, when to call a professional, and how to fix a cracked sheetrock ceiling step by step so the repair lasts.
How to Repair Drywall Cracks in Ceilings: A Complete Guide
Ceiling cracks are one of the most common home repair issues in the Lexington, SC area. Homes throughout Lexington, Red Bank, Gilbert, and the Lake Murray area experience them year after year. According to home inspection experts at Keystone Home Inspection, the three most common causes of ceiling cracks are aging buildings, structural damage, and substandard construction. The good news is that most cracks you will ever see are cosmetic. They look alarming, but they do not mean your house is falling down.
That said, some cracks do signal a real problem. Knowing the difference between a harmless hairline crack and a serious structural crack is the most important thing any homeowner can learn. This guide answers all the real questions people are typing into search engines, from “how to fix a cracked sheetrock ceiling” to “does a ceiling crack mean the house is unstable,” and walks you through every repair step in plain language.
Why Is My Ceiling Cracked Where It Meets the Wall?
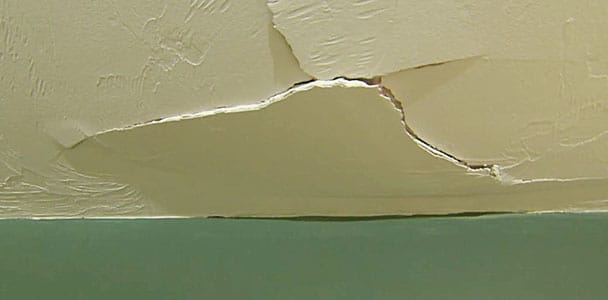
A ceiling cracked where it meets the wall is most often caused by roof truss movement. According to Bob Vila, roof trusses are built to shift slightly as the wood inside them expands and contracts with attic temperature and moisture changes. When the truss pulls upward, it lifts the ceiling drywall along with it, creating that familiar gap between the ceiling and the wall. This is called truss uplift, and it is extremely common in South Carolina homes where heat and humidity swing dramatically between summer and winter.
Homes in Lexington, SC deal with this more than homeowners in cooler, drier climates. The combination of high summer heat, humidity from the Lake Murray area, and cooler winters creates constant expansion and contraction inside attic framing. The result is a crack that keeps coming back in the same spot every year. A cosmetic fix like flexible caulk or crown molding attached only to the wall framing (not the ceiling) can disguise the gap without permanent results. For a true fix, the drywall panel edges need to be detached from the trusses and reattached using ceiling clips or wall blocks.
If the crack at the wall-ceiling junction is also accompanied by bowing walls or doors that stick, it is time for a professional evaluation before attempting any drywall repair.
What Do Structural Ceiling Cracks Look Like?
Structural ceiling cracks look wide, long, or diagonal, and they often travel from the ceiling down a wall in a continuous line. According to The Real Seal LLC, a crack running across the ceiling and continuing down the wall is a strong sign of structural damage that requires immediate professional attention. A crack paired with a sagging or drooping ceiling is also a serious structural warning sign. Multiple small cracks clustered in the same area of a ceiling indicate more movement than normal and should be evaluated by a professional.
Here is a quick breakdown of what different crack patterns actually mean:
| Crack Type | What It Looks Like | What It Usually Means | Action Needed |
|---|---|---|---|
| Hairline crack | Very thin, less than 1/16 inch wide | Normal settling, paint buildup, humidity fluctuation | Monitor; repair cosmetically |
| Straight crack along seam | Runs along drywall joint | Improperly taped joint or insufficient drywall mud | Re-tape and re-mud |
| Spider web / starburst | Small cracks radiating from a center point | Seasonal movement, joint compound applied too thick | Repair cosmetically |
| Discolored crack | Yellow or brown staining around crack | Active or past water leak above ceiling | Fix leak first, then repair |
| Crack traveling from ceiling down wall | Continuous diagonal or vertical line | Structural damage, foundation movement | Call a professional immediately |
| Crack with sagging ceiling | Ceiling bulges or droops at crack | Weakened joists or serious water damage | Call a professional immediately |
Sources: The Real Seal LLC; Epp Foundation Repair; Bob Vila; Dalinghaus Construction
Does a Ceiling Crack Mean the House Is Unstable?
No, a ceiling crack does not automatically mean the house is unstable. According to Dalinghaus Construction, most cracks in ceiling drywall are cosmetic and result from normal settling, temperature changes, or poorly taped drywall seams. These non-structural cracks are extremely common and do not pose any danger to the people living in the home. They are simply unsightly.
The National Association of Realtors notes that hairline cracks less than 1 millimeter wide are the most common type of drywall crack and can appear during a home’s normal settling process or after minor temperature and humidity fluctuations. These do not require immediate action. However, the NAR also notes that horizontal cracks running along a wall plane can be a serious sign of foundation issues and should always be assessed by a professional, regardless of their width.
The rule to follow is simple. If a crack is thin, short, and has been in the same spot for years without growing, it is almost certainly cosmetic. If a crack is getting wider, getting longer, or showing up alongside other warning signs like sticking doors or uneven floors, call a professional before doing anything else.
How to Tell If a Ceiling Is Going to Collapse
A ceiling is showing signs it could collapse when you see sagging or bowing in any section, cracks that run along multiple ceiling panels at once, a crack paired with a soft or spongy feeling in the drywall overhead, or visible water damage. According to Groundworks, cracks with sagging or drooping ceiling sections are a sign of serious structural damage and should be addressed without delay. A ceiling that visibly droops in any section is not safe to be under.
Look for these specific warning signs that go beyond a simple cosmetic crack. If the ceiling feels soft when lightly pressed with the back of a hand, moisture has likely weakened the drywall panel. If multiple cracks appear in the same area within a short time, something is actively moving. If the ceiling has pulled away from the wall at more than one point, the structure above may be compromised. In homes near the Lake Murray area, roof leaks from heavy storms are a common cause of sudden ceiling damage that can progress quickly from a stain to a serious sag.
If there is any doubt, do not attempt repairs. Have a professional assess the ceiling before doing anything else.
Are Ceiling Cracks Easy to Fix?
Yes, ceiling cracks are easy to fix when they are cosmetic, non-structural cracks. According to Today’s Homeowner, most ceiling cracks can be repaired as a manageable DIY project with the right tools and patience. Hairline cracks, seam cracks from improperly taped joints, and spider web cracks all fall into the fixable-at-home category. A basic repair kit including joint compound, drywall tape, a putty knife, and sandpaper is all most homeowners need.
The repairs become harder when the crack is wider than 1/4 inch, when the ceiling has multiple layers of old texture, or when the crack keeps coming back after previous repairs. Repeating cracks usually mean an underlying movement issue has not been resolved. According to Erie Drywall, a proper ceiling crack fix can last 5 to 10 years when the underlying cause is addressed and the right repair materials are used. Using a flexible patching compound rather than standard joint compound gives better long-term results in areas that experience seasonal movement.
For homeowners in Lexington, SC who are not comfortable working overhead on a ladder, or whose ceilings have an existing texture like skip trowel or knockdown, bringing in a professional painter and drywall repair team is the smarter choice. Matching texture on a ceiling is one of the harder skills in the trade.
The sheetrock install and repair services offered by Soda City Painting handle ceiling patch work including seamless texture matching across Lexington, Red Bank, Gilbert, and the surrounding areas.
What Is the Best Filler for Cracks in a Ceiling?
The best filler for cracks in a ceiling depends on the size of the crack. For hairline cracks, spackling compound or a lightweight joint compound applied directly with a putty knife works well. For cracks wider than a hairline, pre-mixed drywall joint compound (also called drywall mud) combined with paper tape or fiberglass mesh tape provides a stronger and longer-lasting repair. According to Bob Vila, a flexible patching compound like Elastopatch is the best option for cracks that have already been repaired once and keep returning, because it forms a flexible seal that moves with the ceiling rather than cracking again.
Paper tape is stronger than fiberglass mesh tape for ceiling joints because it is more flexible and less likely to crack under stress. According to Mr. Handyman, paper drywall tape is the preferred choice for ceiling seams and patch borders because it holds better when applied overhead. Fiberglass mesh tape is easier to use for beginners and works well for small hairline repairs where strength is less of a concern.
Never fill a ceiling crack with regular caulk alone. Caulk shrinks over time, does not sand flat, and does not bond well to paint. It will look fine for a few months and then pull away from the edges of the crack.
How to Fix a Cracked Sheetrock Ceiling: Step-by-Step
Here is how to fix a cracked sheetrock ceiling from start to finish. This process covers the standard repair method for cosmetic, non-structural cracks. Before starting, confirm the crack is not growing, not discolored, and not accompanied by any sagging.
Step 1: Gather Your Tools and Materials
You need a utility knife, a 4-inch and 10-inch drywall taping knife, pre-mixed joint compound, paper or fiberglass mesh tape, medium-grit sandpaper or a sanding sponge, a dust mask, safety glasses, a sturdy ladder, drop cloths, primer, and ceiling paint. According to Bob Vila, a 6-inch taping knife works well for removing loose texture and peeling paper, and a small tub of premixed drywall mud is all that is needed for most ceiling crack repairs.
Step 2: Protect the Room
Drywall dust falls straight down from a ceiling. Cover floors with canvas drop cloths rather than plastic, because plastic becomes slippery when wet. Cover furniture with lightweight plastic sheeting. Wet joint compound drips when you are working overhead, so do not skip this step. Homes throughout Lexington, SC that have hardwood floors or carpet under the repair area should take extra care to protect those surfaces before starting.
Step 3: Clean and Prepare the Crack
Use a utility knife to slightly widen the crack along its length. This sounds counterintuitive, but opening the crack slightly creates a groove that grips the joint compound better. Scrape parallel to the crack, not across it. Remove any loose paper facing, old paint chips, or crumbling drywall around the edges. Wipe the area clean with a damp cloth and let it dry fully before applying any compound.
Step 4: Secure Any Loose Drywall
If the ceiling panel feels slightly loose near the crack, drive drywall screws into the ceiling joists on both sides of the crack before applying tape. Today’s Homeowner recommends securing loose panels first to prevent further movement and repeated cracking. Screwing into solid joists stabilizes the panel so the compound has a firm base to bond to.
Step 5: Apply Tape and First Coat of Compound
For hairline cracks, press self-adhesive fiberglass mesh tape directly over the crack. For wider cracks, apply a thin base coat of joint compound first with a 4-inch knife, press paper tape into the wet compound, then smooth it flat. According to iFixit, it is important to keep tape centered over the crack and to use as long a single piece as possible rather than multiple short pieces. Apply joint compound over the tape with a 10-inch drywall knife, feathering the edges outward so there is no hard ridge at the edge of the repair.
Step 6: Apply Second and Third Coats
Allow the first coat to dry completely before applying a second coat. According to iFixit drywall repair experts, thin coats are critical for a good ceiling repair. Thick coats of joint compound shrink as they dry, which creates new cracks in the compound itself. Apply two to three thin coats, widening the feathered area with each coat. Let each coat dry fully between applications. Most coats take 4 to 8 hours to dry depending on humidity levels. In the Gilbert and Red Bank areas during summer months, higher humidity can slow drying time.
Step 7: Sand Smooth
Once the final coat is fully dry, sand the repaired area with a medium-grit sanding sponge until it is flush with the surrounding ceiling. Sand lightly and check your work often by holding a flashlight at a low angle to reveal any ridges or low spots. A dust mask and safety glasses are not optional during this step. Drywall dust is a respiratory irritant, and working overhead means the dust falls directly toward your face.
Step 8: Match the Texture
Matching an existing ceiling texture is the hardest part of a DIY ceiling repair. Smooth ceilings are easy. If the existing ceiling has skip trowel, knockdown, or orange peel texture, you will need to replicate that pattern using the appropriate technique. According to This Old House, practicing the skip trowel technique on a spare piece of drywall before touching the ceiling is the best way to get the pattern right. Apply joint compound with very light pressure and allow the trowel to skip across the surface. For popcorn ceilings, an aerosol texture spray product can approximate the finish.
If the ceiling has a heavy popcorn texture installed before 1978, test for asbestos before disturbing it. Bob Vila notes that popcorn ceilings from that era can contain asbestos, and those repairs should be handled by a licensed asbestos remediation professional.
Step 9: Prime and Paint
Apply a coat of drywall primer to the repaired area before painting. Priming is not optional. Unprimed joint compound absorbs paint differently than the surrounding ceiling, causing the repaired spot to show through as a dull patch even after two coats of paint. Prime first, let it dry, then paint the entire ceiling rather than spot-painting the repair. Painting only the patch almost always results in a visible color difference. The full ceiling needs a fresh coat for a seamless result.
After ceiling repairs are complete, a fresh coat of interior painting throughout the room ties everything together and makes the repair completely invisible.
What Causes Ceiling Cracks in Older Homes?
Ceiling cracks in older homes are caused by natural settling, aging building materials, accumulated paint layers, moisture cycling, and in some cases, original construction defects. According to Epp Foundation Repair, hairline cracks less than 1/16 inch wide are usually caused by paint buildup or plaster expanding and shrinking due to fluctuating humidity levels. Older homes simply have had more years of seasonal expansion and contraction, which adds up over time.
Homes in the Lexington area that were built before the 1990s may have original drywall tape that has dried out and lost its bond over decades. This causes long, straight cracks directly over the joints between drywall panels. The crack is not the drywall splitting. It is the tape pulling away. This repair is straightforward: scrape away the old tape, re-tape with paper tape, apply fresh joint compound, and repaint.
Older homes near the Shandon and Forest Acres areas of greater Columbia sometimes have plaster ceilings rather than drywall. Plaster crack repair is similar in concept but uses different materials, and plaster that has lost its bond to the lath beneath it needs professional attention. Trying to patch delaminated plaster without addressing the bond failure leads to repeated cracks in the same spot.
What Not to Say to a Homeowners Insurance Adjuster About Ceiling Cracks
What not to say to a homeowners insurance adjuster about ceiling cracks is anything that frames the damage as a pre-existing condition, long-standing neglect, or a maintenance issue you knew about and ignored. Insurance adjusters look for reasons to deny or reduce claims. Telling them the crack has been there for years or that you noticed it months before it worsened is one of the most common ways homeowners accidentally hurt their own claim.
Document everything with photos before making any repairs. Take wide shots showing the full ceiling and close shots showing the crack in detail. Note the date the crack first appeared or was first noticed. If the crack appeared after a specific event like a severe storm, a plumbing leak, or a neighbor’s construction project, say so clearly and connect the damage to that event.
The most important thing to remember is not to repair the crack before the adjuster has seen it. Adjusters need to see the original damage to assess its cause. Repairing before the inspection, even with good intentions, can eliminate the evidence that would have supported your claim.
Does Homeowners Insurance Cover Cracks in the Ceiling?
Homeowners insurance covers cracks in the ceiling when the crack was caused by a covered peril such as a sudden plumbing leak, wind damage from a storm, or an accidental impact. Standard homeowners insurance policies in South Carolina generally do not cover ceiling cracks caused by normal wear and tear, gradual settling, aging, or deferred maintenance. If a slow roof leak caused the crack over many months, most policies will treat that as a maintenance issue rather than a sudden covered loss.
Structural damage caused by sudden events is the clearest path to a covered claim. If a pipe bursts above the ceiling and soaks the drywall, the resulting ceiling damage is typically covered. If a tree branch falls on the roof during a storm and the impact cracks the ceiling below, that is also generally covered. Contact your insurance provider and review your specific policy before assuming coverage either way.
How Much Does It Cost to Fix a Crack in the Ceiling?
The cost to fix a crack in the ceiling depends on the crack size, the ceiling texture, the height of the ceiling, and whether the repair is DIY or professional. For a small hairline crack, the DIY materials alone may cost very little. A basic drywall repair kit, a small container of joint compound, and a can of primer can handle most simple ceiling crack repairs for a modest out-of-pocket total.
Professional repair costs vary based on scope. Simple patch work on a smooth ceiling costs less than a repair on a textured ceiling that requires full texture matching and full ceiling repainting. Ceiling height matters too. Homes with standard 8-foot ceilings are faster and easier to work on than homes with 9, 10, or vaulted ceilings, which require more time and scaffolding. For specific pricing for your home in Lexington, Red Bank, Gilbert, or the Lake Murray area, the right approach is to contact a local professional for a free estimate based on the actual scope of your repair.
Many homeowners in the Lexington area find that combining ceiling crack repair with a full house painting project gives the best value, since the ceiling gets repaired and repainted in a single visit.
Why Does a Ceiling Crack Keep Coming Back?
A ceiling crack keeps coming back because the underlying cause has not been fixed. According to Erie Drywall, cracks return when underlying structural problems are not resolved, such as active moisture issues or foundation movement. Patching a crack with joint compound without addressing what caused the crack is like putting a bandage over a splinter. It looks better for a while, and then the same problem shows through in the same spot.
The most common reasons a repaired ceiling crack returns are ongoing foundation movement, seasonal truss uplift that was not corrected at the attachment point, a slow leak that was not found or fixed before the repair, joint compound that was applied too thick and cracked as it shrank, and patch work done without tape reinforcement so the repair has no tensile strength.
If a crack in a Lexington home has been repaired two or more times and keeps returning, the repair method is probably wrong, the underlying cause is probably still active, or both. A professional evaluation before the next repair will save time and money compared to repeating the same failed fix.
Can You Paint Over a Ceiling Crack Without Fixing It?
No, you should not paint over a ceiling crack without fixing it first. Painting directly over a crack without tape and compound does not hide the crack for long. Paint alone is not thick enough to bridge a gap in drywall, and the crack will show through the fresh paint as soon as it dries and the surface light hits it at the right angle. More importantly, painting over an active crack traps moisture and can accelerate deterioration of the surrounding drywall.
The only exception is a very fresh hairline crack that has been stable for at least one full year. In that case, a skim coat of spackling pressed into the crack with a finger, sanded flat, and painted over can provide a temporary cosmetic improvement. This is not a permanent repair. It will eventually need to be done properly with tape and compound.
For homes preparing for resale in the Lexington, SC market, ceiling crack repairs paired with fresh paint are one of the highest-return updates a seller can make. Buyers notice ceilings. A smooth, freshly painted ceiling signals a well-maintained home and removes doubt from the buyer’s mind during the walkthrough.
The drywall repair painting service from Soda City Painting handles exactly this combination, repairing damaged drywall and painting the repaired areas to blend seamlessly with the surrounding ceiling.
How Do You Repair a Ceiling Crack Where the Wall Meets the Ceiling?
You repair a ceiling crack where the wall meets the ceiling by first identifying whether it is a truss uplift crack or a settlement crack. For truss uplift cracks, the permanent fix involves removing the nails or screws that attach the drywall edge to the truss and reattaching the panel to clips or blocks on the wall plate, according to Bob Vila. A simpler cosmetic approach is to install crown molding attached only to the wall framing, which hides the gap without fighting the natural movement of the truss above.
For settlement cracks at the wall-ceiling junction, monitor the crack for at least six months to confirm it is not actively growing before repairing. If it is stable, fill with flexible paintable caulk, smooth with a wet finger, and repaint. Using flexible caulk rather than rigid joint compound in this specific location helps the repair survive seasonal movement without cracking again.
When Should You Call a Professional for Ceiling Crack Repair?
You should call a professional for ceiling crack repair when the crack is wider than 1/4 inch, when the crack is accompanied by sagging, when you see water stains or discoloration around the crack, when the crack travels from the ceiling down a wall, when the crack has been repaired before and keeps returning, or when the ceiling has a heavy texture that would be very difficult to match. According to Today’s Homeowner, a professional assessment can identify underlying structural issues and repair them properly to prevent further damage.
Homeowners in the Gilbert, Red Bank, and Lake Murray communities should also call a professional when the ceiling is unusually high, when the home was built before 1978 and has a popcorn ceiling (possible asbestos), or when the repair area is large enough that working overhead for an extended period is not safe or practical.
Professional drywall crews have the tools and experience to apply texture matching that a DIYer cannot replicate on the first try. The cost of a professional repair is usually well worth it compared to the time and frustration of a DIY repair that does not match the surrounding ceiling.
For commercial properties throughout the Lexington area, ceiling crack repairs as part of a larger project fall under commercial painting and sheetrock services that cover full scope interior restoration.
Frequently Asked Questions
How Do You Fix a Cracked Sheetrock Ceiling in Lexington, SC?
You fix a cracked sheetrock ceiling in Lexington, SC by cleaning the crack, slightly widening it with a utility knife, applying fiberglass mesh or paper tape, covering with two to three thin coats of joint compound, sanding smooth, priming, and repainting. Because Lexington, SC homes experience high summer humidity and significant seasonal temperature swings, using a flexible joint compound gives better long-term results than standard mud. For ceilings with existing texture like skip trowel or knockdown, calling a local professional ensures the texture match is seamless.
Does a Ceiling Crack in a Lake Murray Area Home Mean Foundation Problems?
No, a ceiling crack in a Lake Murray area home does not automatically mean foundation problems. Most ceiling cracks in the Lake Murray, Red Bank, and Gilbert areas are caused by normal seasonal movement, humidity changes, or improperly taped drywall joints. However, if a crack is wider than 1/4 inch, runs from the ceiling down a wall, or is accompanied by uneven floors or sticking doors, a foundation evaluation is warranted. Catching foundation movement early costs significantly less to address than waiting until damage is extensive.
What Is the Best Filler for Ceiling Cracks in Humid Climates Like South Carolina?
The best filler for ceiling cracks in humid climates like South Carolina is a flexible, pre-mixed joint compound used with paper tape reinforcement. Standard joint compound works for most repairs, but for cracks that keep returning in the same spot, a flexible patching compound creates a seal that can move with the ceiling rather than cracking again. Avoid applying compound in thick coats during humid summer months, as high humidity extends drying time and increases the risk of shrinkage cracks.
How Long Does a Ceiling Crack Repair Last?
A ceiling crack repair lasts 5 to 10 years when the underlying cause is addressed and the correct repair materials and techniques are used, according to Erie Drywall. Repairs that skip tape reinforcement, use too-thick coats of compound, or ignore an active moisture source will fail much sooner. In homes throughout Lexington and the surrounding communities, repairs on ceilings with stable foundations and controlled indoor humidity consistently outlast repairs made in homes with ongoing moisture or settlement issues.
Is It Worth Repairing Ceiling Cracks Before Selling a Home in Lexington?
Yes, repairing ceiling cracks before selling a home in Lexington is worth it. Buyers and their inspectors always notice ceiling cracks. Visible cracks raise red flags and invite lowball offers or requests for credits at closing. A smooth, freshly painted ceiling signals a well-maintained home and removes one of the most common buyer objections. For homeowners in the Lexington area preparing for resale, ceiling repair and fresh interior painting is one of the best returns on investment available before listing.
Can a Popcorn Ceiling Crack Be Repaired in Older Lexington Homes?
Yes, a popcorn ceiling crack can be repaired in older Lexington homes, but the process requires an important first step: testing for asbestos if the popcorn texture was applied before 1978. Popcorn ceilings from that era sometimes contain asbestos, which is dangerous when disturbed. If the test is clear, the repair involves applying joint compound to the crack, sanding when dry, and using an aerosol popcorn texture spray to blend the repaired area before painting. A professional painter who specializes in texture matching can make the repair nearly invisible.
What Causes Ceiling Cracks to Keep Coming Back After Repair?
Ceiling cracks keep coming back after repair because the underlying cause was not resolved before the patch was applied. The most common reasons are ongoing foundation movement, active moisture from a roof or plumbing leak, seasonal truss uplift at the wall-ceiling junction, and joint compound applied too thick without proper tape reinforcement. In homes throughout the Lexington, SC area, seasonal humidity is a frequent contributor to recurring cracks. Addressing the root cause before repairing and using flexible compound in prone areas is the key to a repair that stays.
Ready to Say Goodbye to Ceiling Cracks for Good?
Most ceiling cracks in Lexington, Red Bank, Gilbert, and the Lake Murray area are cosmetic and completely fixable. But getting a repair that truly lasts, blends with your existing texture, and holds up through South Carolina’s heat and humidity takes the right skills and the right materials.
Soda City Painting is a locally owned, licensed, and insured painting and drywall repair company serving Lexington, SC and the surrounding communities. The team handles everything from ceiling crack repairs and seamless texture matching to complete interior repaints. Every project is done with the attention to detail that gets homes sale-ready and keeps homeowners happy for years.
Do not keep staring at that crack and wondering. Call Soda City Painting at (803) 221-0771 or visit the drywall repair and painting page to request a free estimate. The sooner a crack is properly repaired, the less it costs and